What is Respondus Software (also known as Respondus 4)?
Respondus 4 is a licensed test conversion tool used at Humber to prepare test questions for Blackboard. It is a PC only tool. If you are a Mac user, please refer to other online Test Building Tools.
You can use Respondus in two ways:
- Build your test questions directly in Respondus and publish them to a Blackboard-compatible file.
- Import a specifically formatted file (typically Microsoft Word or a text file) and publish them to a Blackboard-compatible file.
Step 1: Create the Respondus File
- Run Respondus on your computer. Note: Respondus works on PC only.
- In the Respondus window, in the Start tab, select Import Questions.

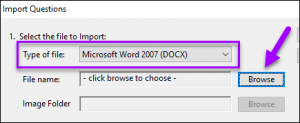
- In the Import Questions dialogue box, under the Select Type of File section, go to Type of file, then select the drop-down arrow > Microsoft Word 2007 (DOCX).
- To upload your Miscrosoft Word file, go to File Name, then select Browse and select the file you want to import.
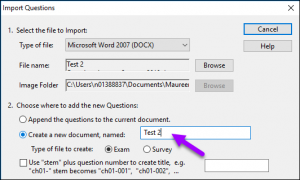
- Go to the Choose where to add the new Questions section, then select Create a new document and enter the new document name.
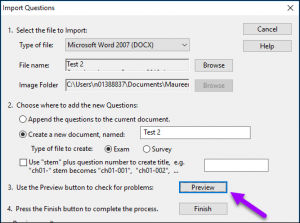
- To preview your questions and detect any possible issues, select Preview.
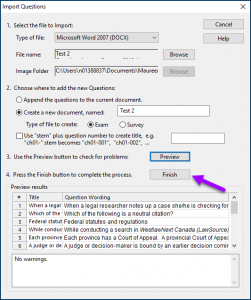
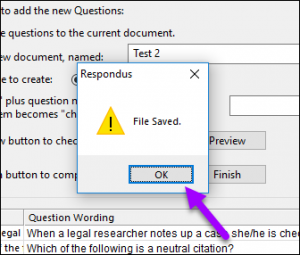
- Select Finish to complete the process. A dialogue box will appear noting that the file was saved.
- Select OK.
Step 2: Publish the Respondus File
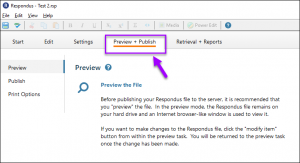
- In the Respondus widow, go to the Preview & Publish tab.
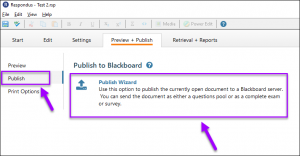
- In the left-hand menu, go to Publish to Blackboard, then select the Publish Wizard button.
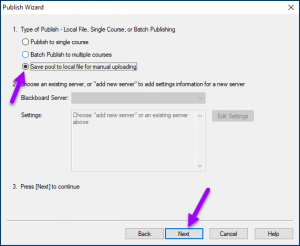
- Under Type of Publish, select Save Pool to local file for manual uploading, then select Next.
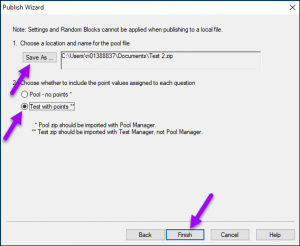
- To save the file to your computer, select Save As, then choose a location on your computer.
- Under Choose Whether to Include Points, select Test with Points, then select Finish.
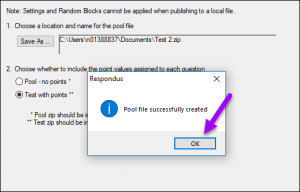
- A prompt will pop-up indicating that the file was successfully created. Select OK.
Step 3: Import the File into the Blackboard Course
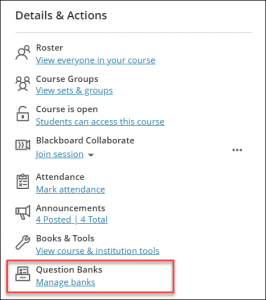
- Open a Blackboard Ultra course. On the Course Content page, under the Details and Actions section, select Manage Banks.
- On the Question Banks page, select the plus sign icon (top-right corner).

- Browse for ZIP files to import.
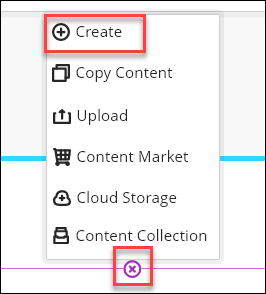
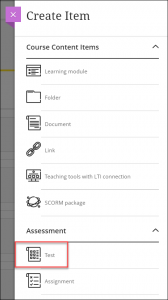
NOTE: View the Supported question types. Unsupported question types are removed. - Return to the Course Content page, locate where in your Course Content you would like to add a test and select the plus sign > Create. The Create Item panel will open on the right.
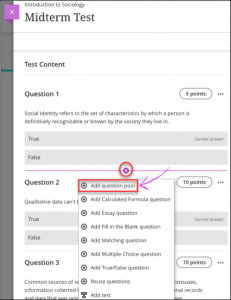
- On the Create Item panel, select Test. The New Test page will open.
- On the test page, locate where you want to add a question pool and select the plus sign > Add question pool. The Add Question Pool page will open.
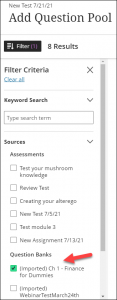
- On the Filter Criteria panel, scroll down to the Question Banks header and select the checkbox for the imported Respondus test.
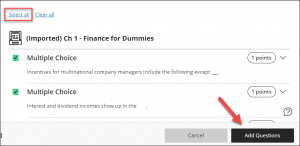
- On the Add Question Pool page, select Select all. When you’ve added all your questions, select Add Questions.
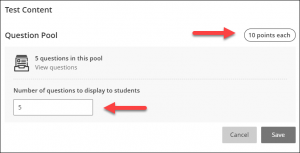
- Enter the point value and the number of questions to display to students. Select Save to add the question pool to your assessment.
NOTE: the point value is assigned to each question in the pool. You can’t assign a separate point value for individual questions in the same pool.
Need support? Contact the Innovative Learning Support Centre. We are here to help!