What are the meeting options in Microsoft Teams?
Meeting options are settings that can be customized to personalize participant engagement and meeting security. Only the meeting organizer or co-organizers can make changes to meeting options. While it may be possible to edit the meeting options while in session, it is generally recommended that changes are made prior to starting the meeting, at the time it is scheduled.
NOTE: This also applies to recurring meetings. Meeting options can be edited by going into any of the scheduled meetings in Teams or Outlook.
How do I access meeting options?
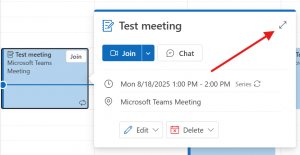
- On your Outlook or Teams calendar, click on the event/meeting and click on ‘View event’ option (double arrow icon) to expand the meeting details.
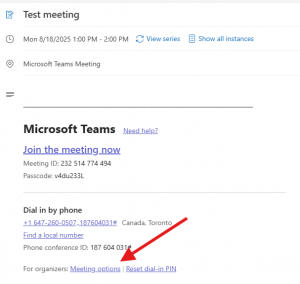
- In the event details, click on the ‘Meeting options’.
Some options may be disabled by default. Below are some of the most common settings instructors may need to verify or adjust for online classes.
How do I enable/disable the meeting lobby in the meeting access area?
To enable the meeting lobby, change the drop-down menu under ‘Who can bypass the lobby?’ to ‘Only organizers and co-organizers’ and keep the option ‘People dialing in can bypass the lobby’ toggled off.
Only allow organizers and co-organizers to admit attendees from the lobby and keep the ‘Announce when people dialing in join or leave’ toggled off to minimize disruptions.
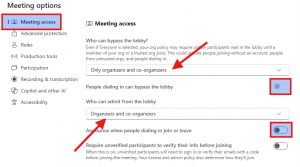
Although this option is available, it is generally recommended for online classes to disable the lobby to ensure you are not interrupted by late attendees while you are presenting. This support article provides more information about the meeting lobby.
How can I allow/disallow attendees to present during an online session from the ‘Roles’ area?
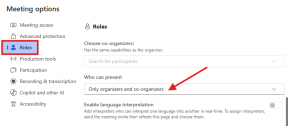
Generally, it is recommended for instructors to be the sole meeting organizer unless they are in a co-teaching situation. By default, meeting invitees (i.e. students) are added to the event with the Attendee role and can present/share content.
Unless students are required to present content in your class, it is recommended that this option be disabled for them, by selecting ‘Only organizers and co-organizers’ in the ‘Who can present’ option. If you need to select only specific students to be able to present, you can do so by selecting ‘Specific people’ in that dropdown menu. Everyone else would become Attendees without the option to present.
This support article provides more information about Roles in Teams meetings.
How can I enhance student engagement using the Participation settings?
To maximize engagement in your online class, the following settings are recommended to be enabled. They are typically all on initially:
- Allow mic for attendees
- Allow camera for attendees
- Meeting chat on
- Allow reactions
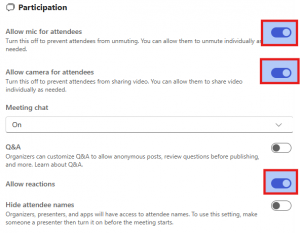
From this area, you can also turn on or off the meeting chat, enable the ‘Q&A’ feature, hide attendee names if privacy is required, as well as generate attendance reports if required.
How can I record and transcribe the meeting using the Recording & Transcription settings?
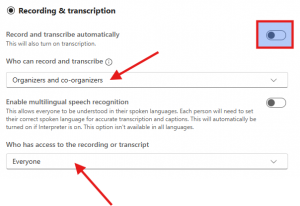
Instructors may want to record their online sessions to make them available for students or for personal use. While the option to record and transcribe automatically is available, it is suggested that this is toggled off as there have been glitches where sessions are not automatically being recorded. Instead, kindly start recording and transcription as soon as you begin your online class – you can learn more about recording within your Teams meeting here.
Set the recording/transcription privilege only to organizers and co-organizers. You may then edit the access to the recording or transcript according to your needs.
How do I view the recording after my online session and change the access settings for the recording?
These guides provide instructions on how to locate your recording and edit access to your recording in Microsoft Stream:
Need support? The Innovative Learning Support Centre is here to help!