What Is Teach in Copilot?
Teach is an AI-powered application in Microsoft Copilot designed to support educators with lesson planning, assessment creation, and student support. Teach can support faculty by:
- Saving time on repetitive tasks like re-designing lesson plans or creating rubrics
- Facilitating brainstorming and enhancing creativity
- Improving accessibility by generating study guides and lessons for diverse learners
- Supporting assessment design and creation with customizable quizzes, assignments, and feedback prompts
Learn more in this video:
Please note that Teach is a relatively new Copilot app. Its existing functionalities are limited, but more features will be released soon!
How can I access Teach?
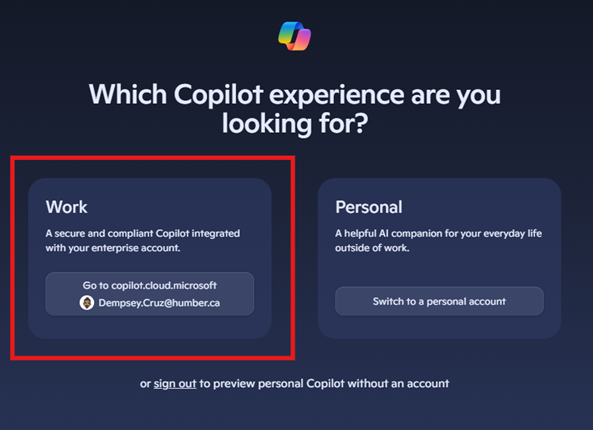
- Access Microsoft Copilot using your Humber credentials and follow the prompts to log into your Copilot Enterprise account.
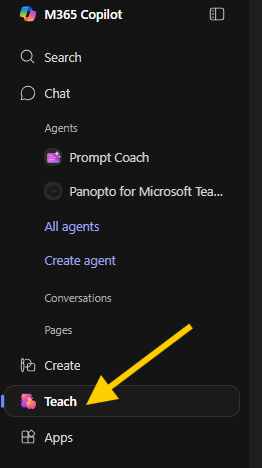
- On the left side of the screen, locate ‘Teach’ and click to launch the app.
- The Teach home page consists of three sections: Teaching tools, History, and Resources.
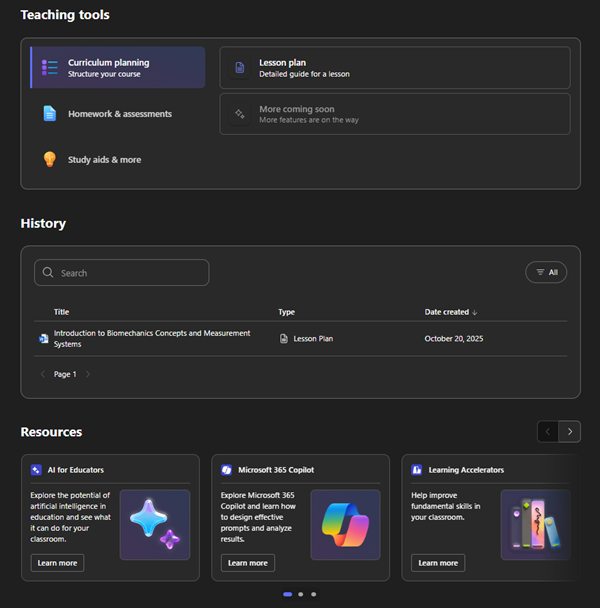
- Teaching tools: Here you will find the options to create a lesson plan, design rubrics, and generate flashcards to support student learning.
- History: All the files you’ve created with Teach will show up in this section, filterable by type (e.g. lesson plans, rubrics, and flashcards).
- Resources: This section contains useful resources by Microsoft to help you explore and use Copilot for teaching and learning.
Please note that Teach is a relatively new Copilot app. Its existing functionalities are limited, but more features will be released soon. There are 4 main teaching tools available:
- Curriculum planning
- Modifying existing content
- Homework & assessments
- Study aids & more
Learn more about each below.
Curriculum planning tools in Microsoft Teach
Design a lesson plan aligned with your learning outcomes with the support of Teach’s curriculum planning feature:
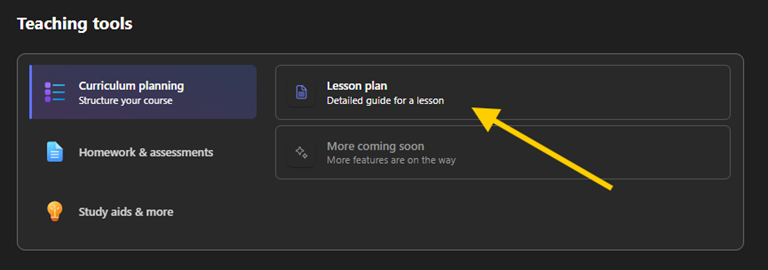
- In Teaching tools, select ‘Curriculum planning’ > ‘Lesson plan’
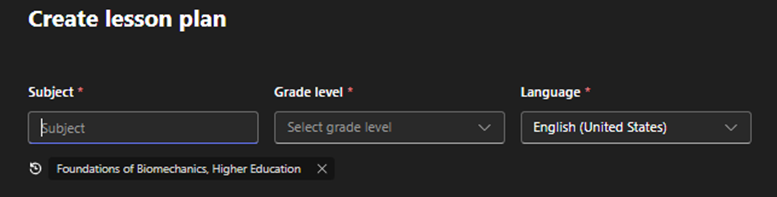
- Customize the lesson plan settings and type in the title of your lesson, grade level (kindergarten to higher education) and language. For example, you may type in ‘Foundations of Biomechanics’, select ‘higher education’, and English (United States). Your prior entries may also show up below these entry fields.
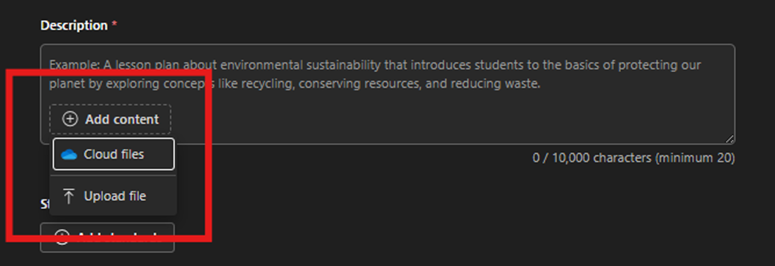
- In the description field, explain the topic and purpose of your lesson and include the learning objectives. It is recommended that you upload a file of your teaching material(s) to ensure that it generates a relevant and accurate output. You may upload several files from your OneDrive or local device but do note that the number of files and the volume of content within each file may impact the accuracy of the generated lesson plan. It is encouraged to remove extraneous information as much as possible to keep the content focused on the lesson topic.
 Please note: The standards section currently only includes curriculum standards for kindergarten to grade 12 and most likely may not be applicable to your lesson plan.
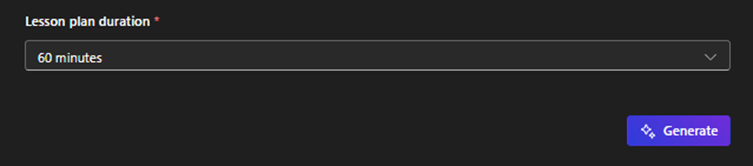
 - Finally, set the lesson plan duration and click ‘Generate’.
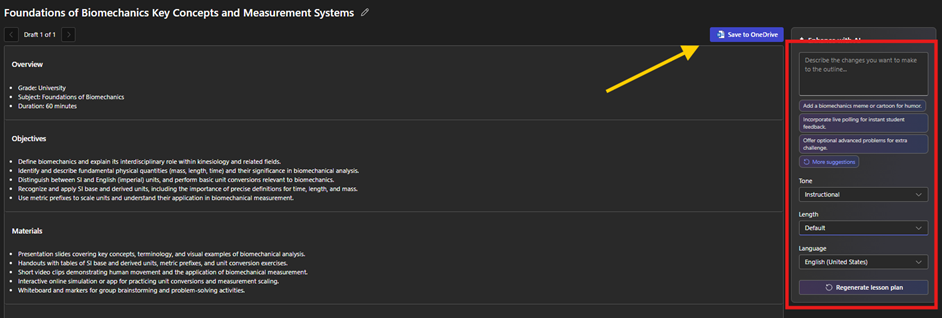
- Teach will generate a lesson plan based on your customizations. You can review, edit, add or remove sections, and further customize the lesson using the options on the right side of the screen. Once you have finished the review and edit process, you may save the file to your OneDrive, where you can continue to edit the lesson or export it for your use.
Tools for modifying existing content in Microsoft Teach
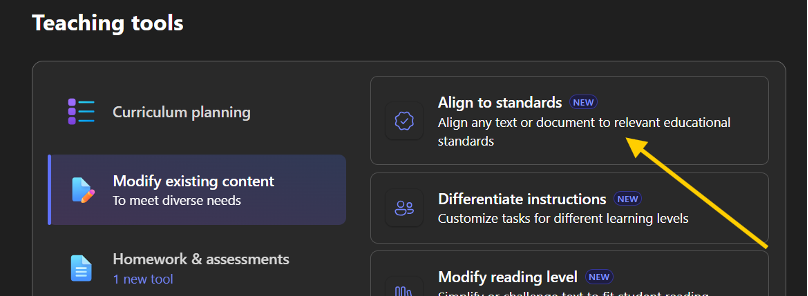
- In Teaching tools, select ‘Modify existing content’ > ‘Align to standards’
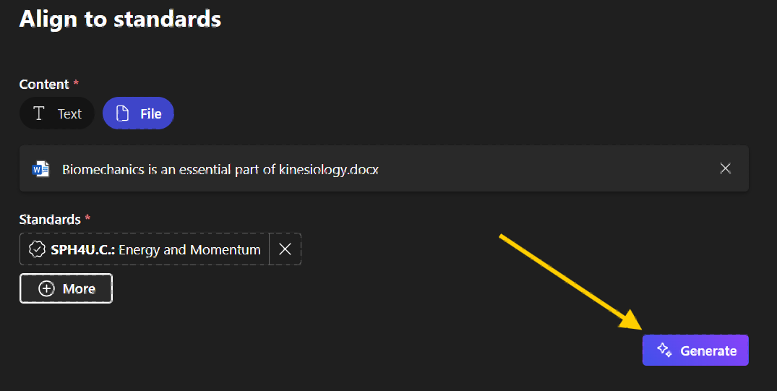
- Type or paste your teaching content into the textbox or upload a reference file. Then click on ‘Add standards’.

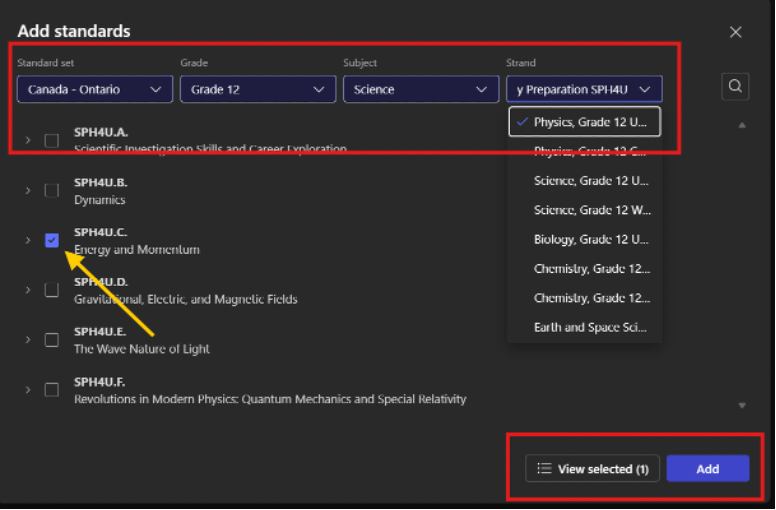
- Click on the dropdown menus to select the standard, grade, subject, and strand. You may select more than one strand. Once ready, click the ‘Add’ button.
- Click ‘Generate’ to align your teaching document to your selected standards.
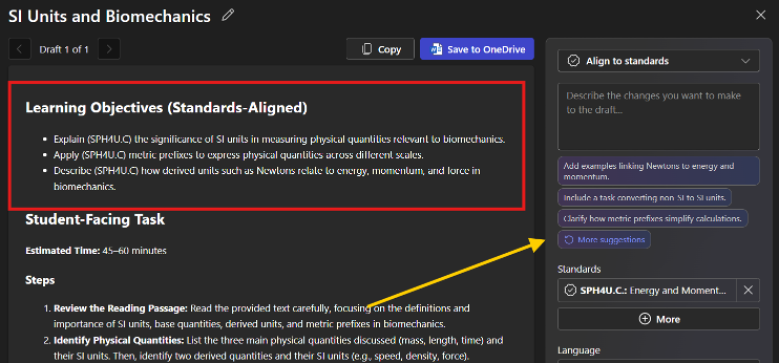
- Your document will be transformed according to the standards selected. You may continue to edit it until you are satisfied with the results.
- In Teaching tools, select ‘Modify existing content’ > ‘Differentiate instructions’
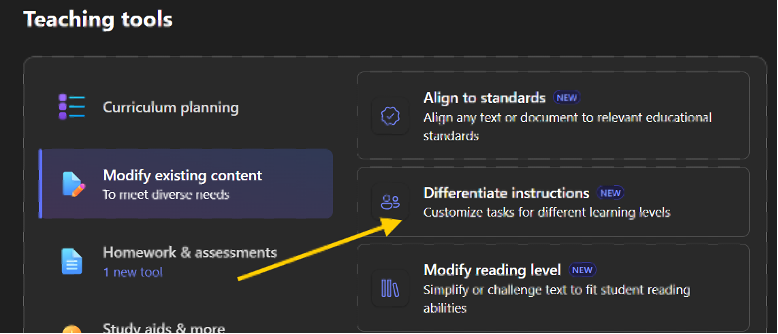
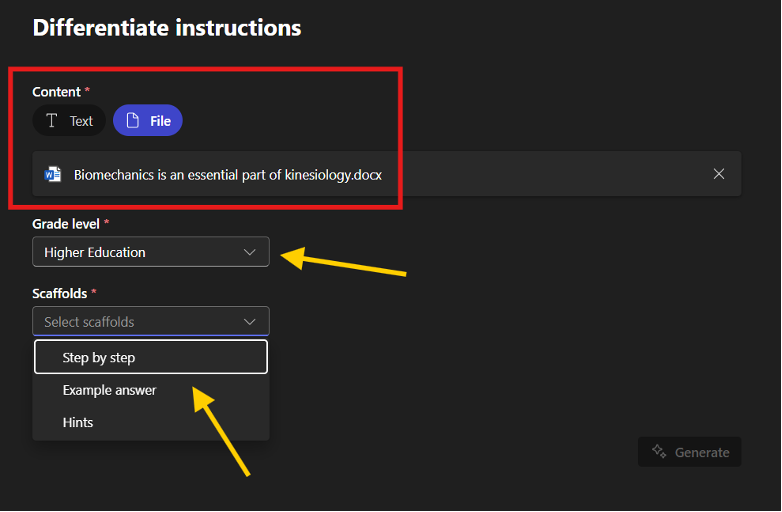
- Copy and paste or upload your content. Specify the grade level or your choice (e.g., Higher Education) and the type of scaffold (e.g., Step by step, example answer, or hints).
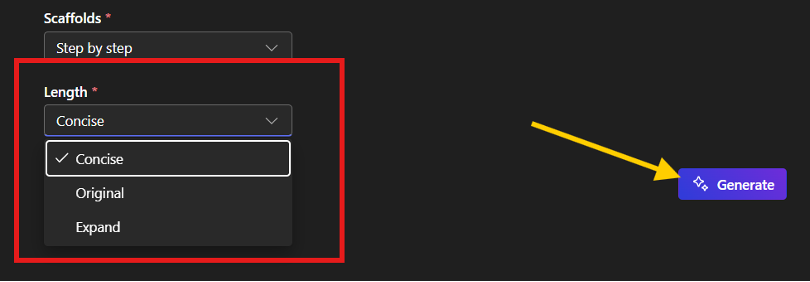
- Select the length of the desired content and click on ‘Generate’.
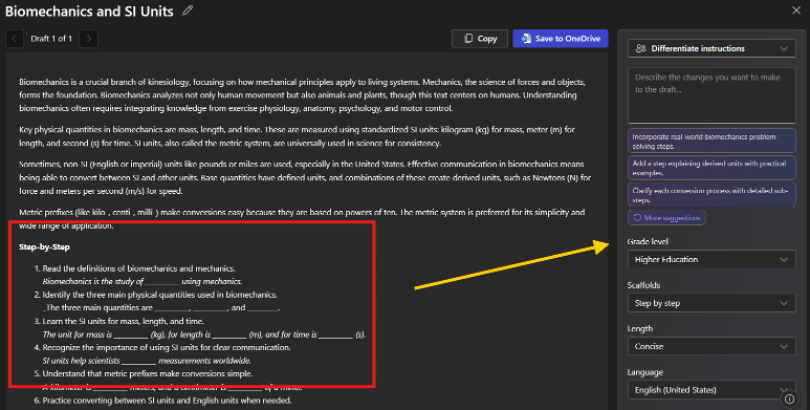
- From here, you can continue to edit the generated content. Be sure to review the differentiated instruction for accuracy and relevance.
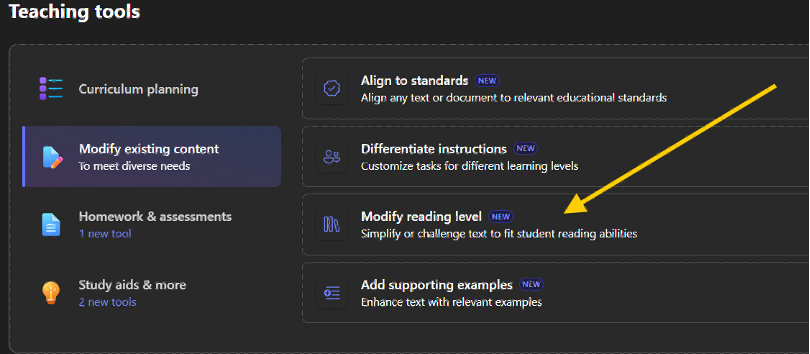
- In Teaching tools, select ‘Modify existing content’ > ‘Modify reading level’
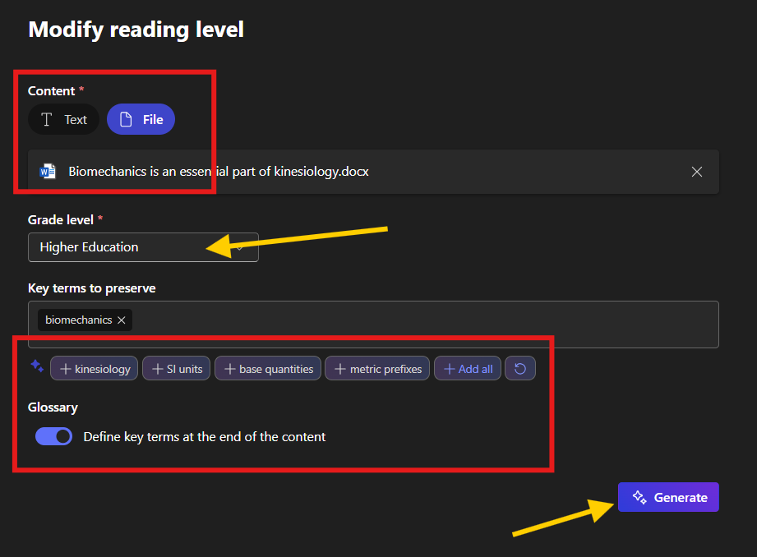
- Copy and paste or upload your content, and select the target grade level (e.g., higher education). Teach will suggest key terms from your document, which you could then add to guide student learning. You also have the option to turn on the glossary section to help clarify key terms at the end of the content. Click ‘Generate’ when you are satisfied with your selection.
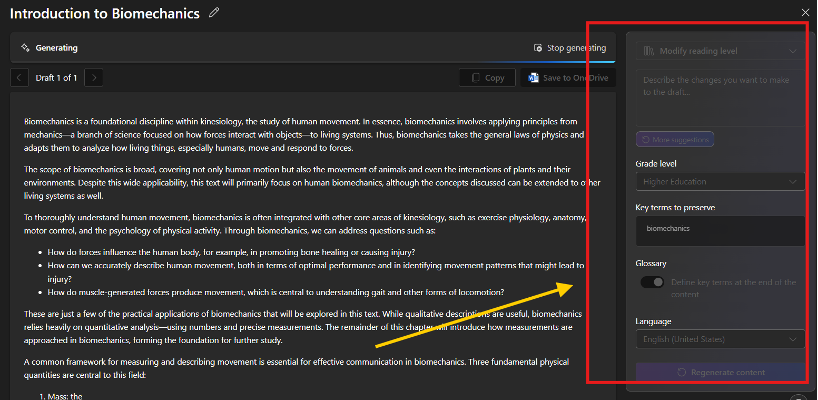
- Note: Generation may fail if your content is too lengthy. From here, you can continue to edit the generated content. Be sure to review it and check that it matches the desired reading level. You may also change the settings from the side menu.
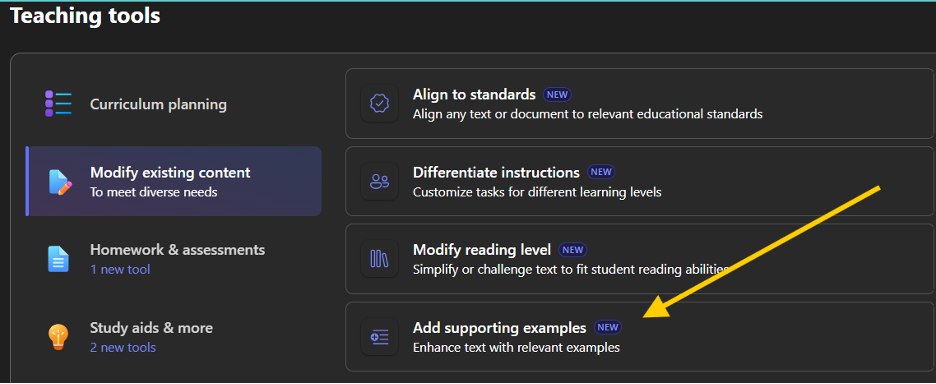
- In Teaching tools, select ‘Modify existing content’ > ‘Add supporting examples’
- Copy and paste or upload your content and select the number of examples you would like to generate from your content. You then have the option to select the most appropriate type of example (e.g., real world, historical, and scientific) for your subject.
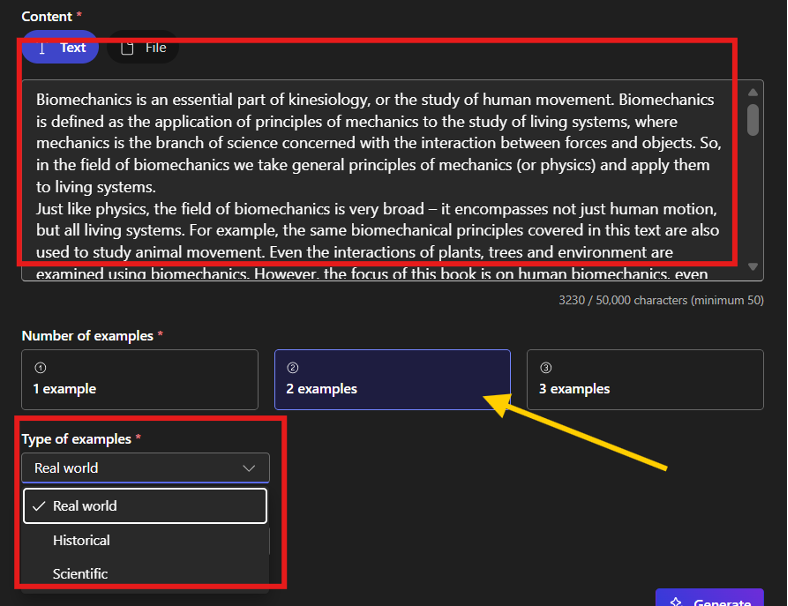
- Specify the complexity of the supporting examples and click ‘Generate’ when you are satisfied with your selection.

- Note: Generation may fail if your content is too lengthy. Supporting examples will be generated from your teaching content. Be sure to check for accuracy and relevance.
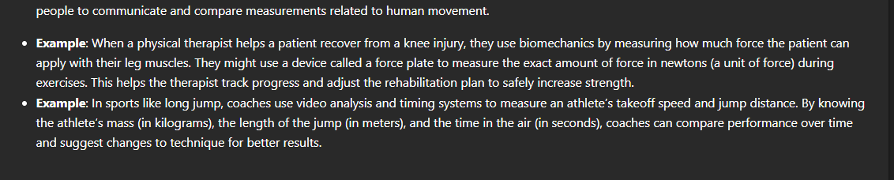
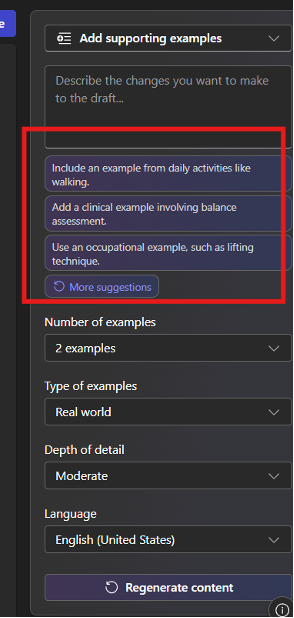
- You may also continue to edit the generated content using the side menu window. Note that Teach will suggest the types of supporting examples to support brainstorming and ideation.
Homework & assessment tools in Microsoft Teach
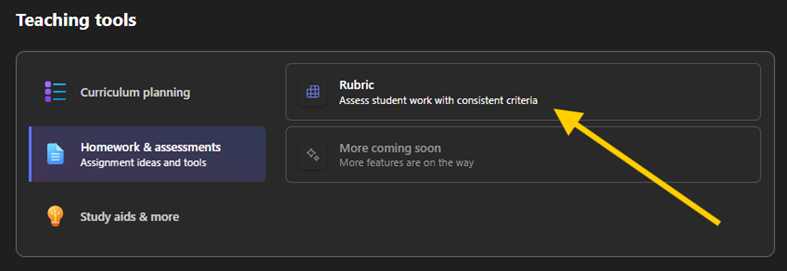
Assess assignments more easily using Teach’s intuitive rubric creation feature:
- In Teaching tools, select ‘Homework & assessments’ > ‘Rubric’
- Select ‘Higher Education’ for the grade level and your language of choice.
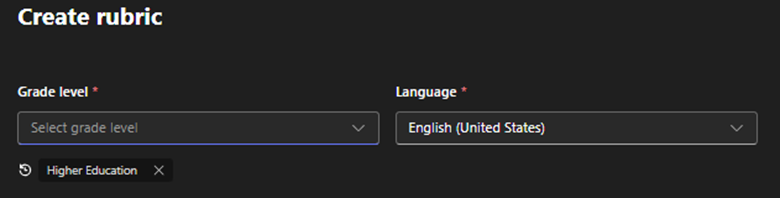
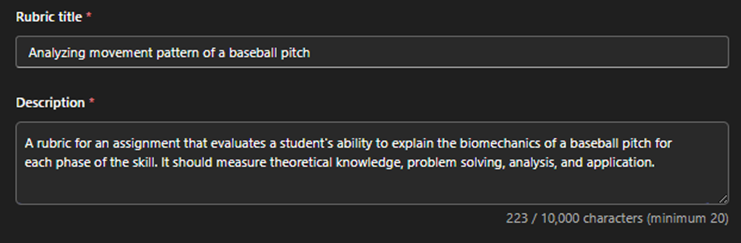
- Type in a descriptive rubric title and a detailed description about your assessment and what you would like the students to be assessed on. You will also be able to indicate individual competencies in the next step, so it’s okay not to include those in this step.
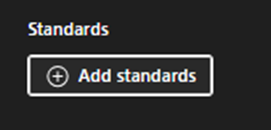
- Please note that the ‘Standards’ section only currently applies to kindergarten to Grade 12 levels so it will likely be irrelevant for you.
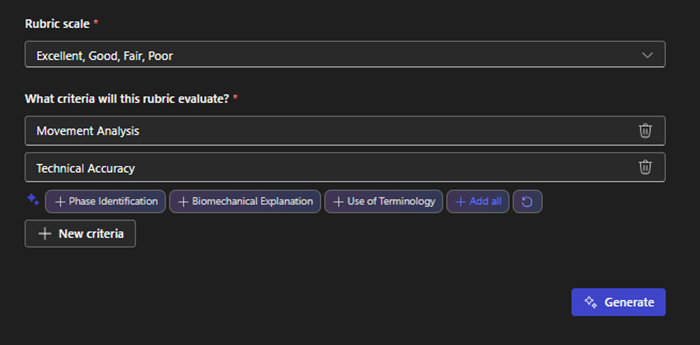
- Click ‘Next’ to proceed to the next step where you can select a rubric scale and add criteria to measure. Make sure these align with your learning objectives. Click ‘Generate’ to produce the rubric draft based on your selections.
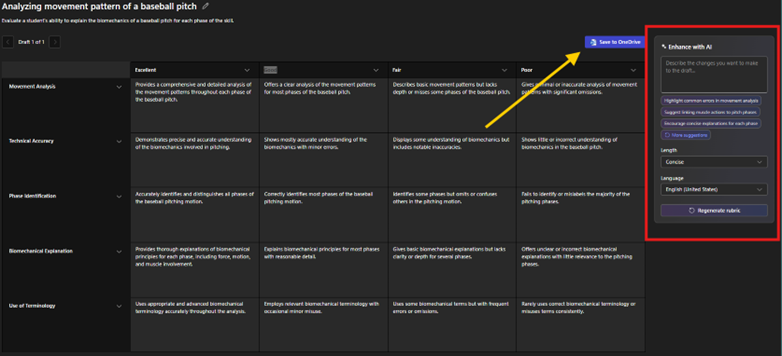
- Teach will generate a rubric draft according to your specifications. You can review, edit, add, reorder or remove competencies, and further customize using the options on the right side of the screen. Once you have finished this process, you may save the file to your OneDrive, where you can continue to edit the rubric or export it for your use.
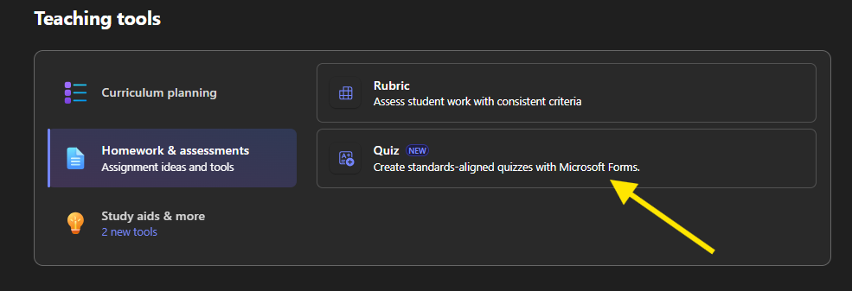
- In Teaching tools, select ‘Homework & assessments’ > ‘Quiz’
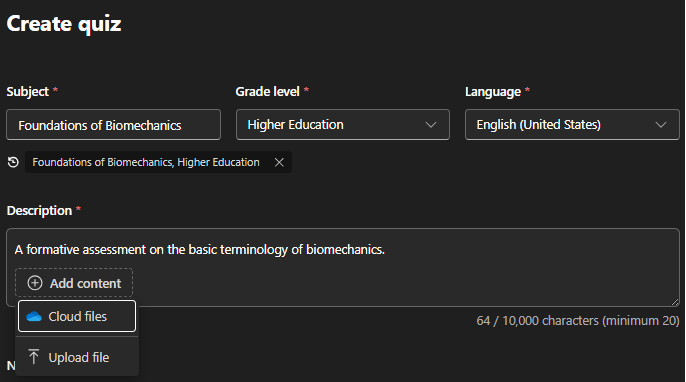
- Type in the subject of your quiz, grade level, and language of your choice. Enter a quiz description that best summarizes the purpose of your quiz. You may also add teaching materials from OneDrive or local device, for Teach to reference when generating your quiz.
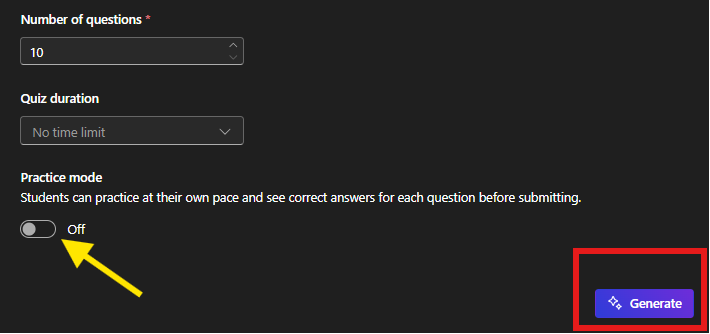
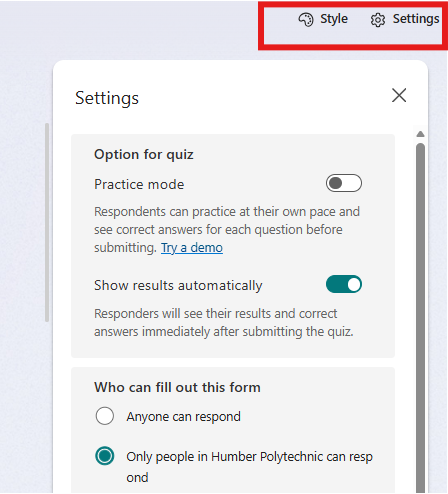
- Set the number of questions (min of 10 to max of 20), quiz duration (no time limit to 180 minutes), and enable/disable practice mode for students. For most cases, practice mode is not recommended to get the most accurate feedback on student progress. Click ‘Generate’ to create the quiz.
- Teach will generate a quiz based on your input. This step may take a moment as it is using Microsoft Forms as the app to create the quiz.
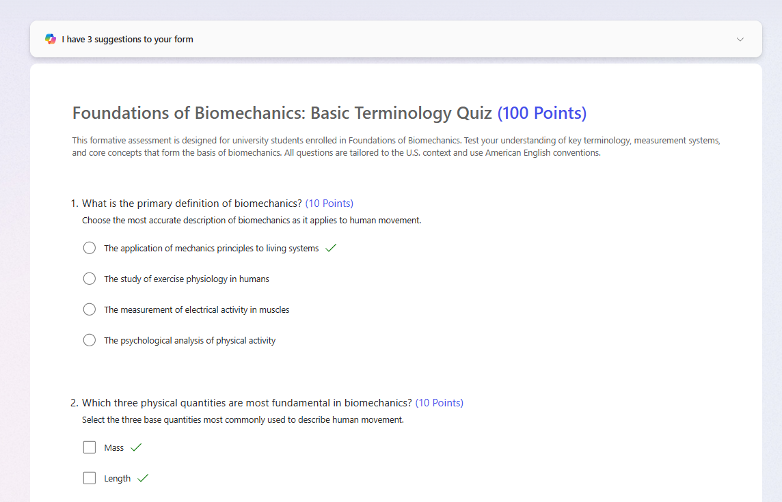
- From here, you can further edit the quiz settings and style. Click ‘Save’ on the top-right corner of the screen.
Study aids & other tools in Microsoft Teach
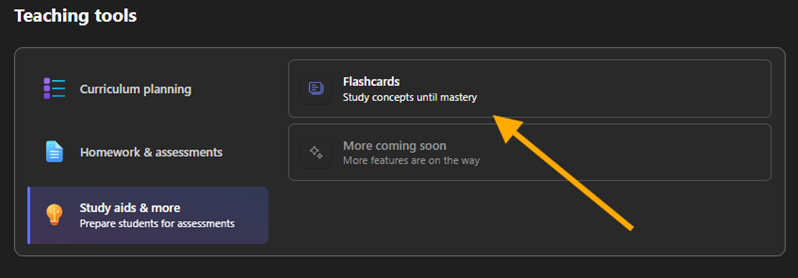
Instructors can use Teach to support student learning by creating study guides, including Flashcards:
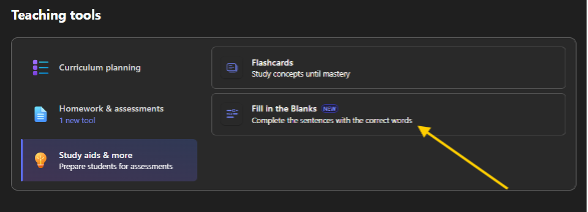
- In Teaching tools, select ‘Study aids & more’ > ‘Flashcards’
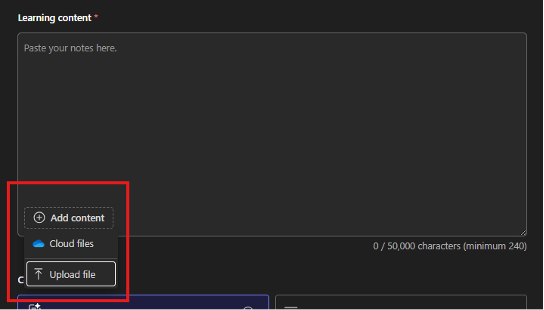
- You can copy and paste the text from your teaching material into the Learning content text field, and/or upload files from your OneDrive or local drive.
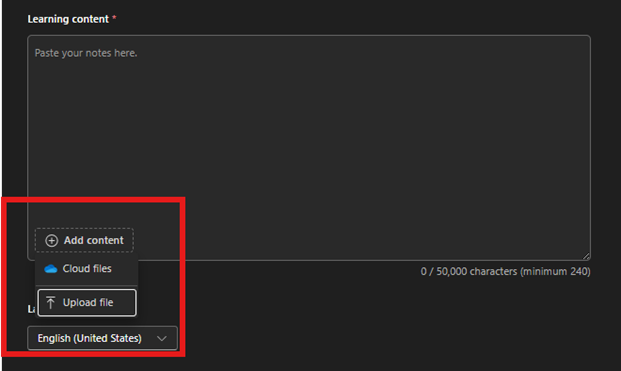
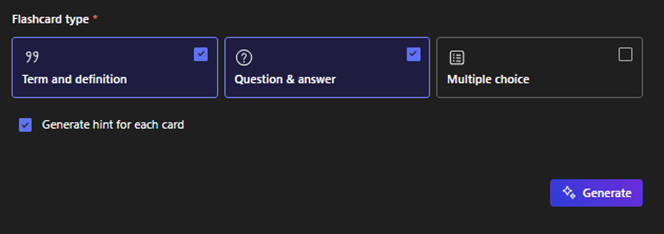
- Select one or more of the following flashcard types and click ‘Generate’.
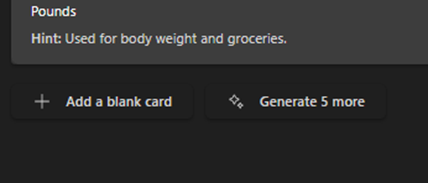
- Teach will suggest questions using the information from your learning content. Scroll to the bottom of the page to add a blank card or generate more questions.
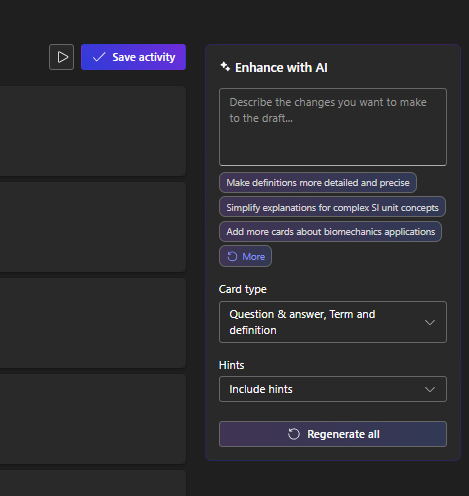
- You may select individual questions to edit and remove them or customize your flashcards using the options on the right side of the screen. Once you’re ready to export the questions, click ‘Save activity’.
- You will be able to access the flashcard activity from the Teach home page. When you open the learning activity, you will see the option to preview or share an access link/code with others.
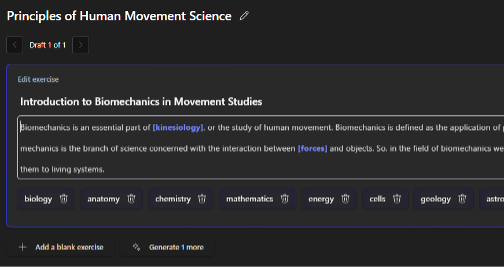
Instructors can use Teach to support student learning by creating study guides, including Fill-in-the-blank questions:
- In Teaching tools, select ‘Study aids & more’ > ‘Fill in the Blanks’
- You can copy and paste the text from your teaching material into the Learning content text field, and/or upload files from your OneDrive or local drive.
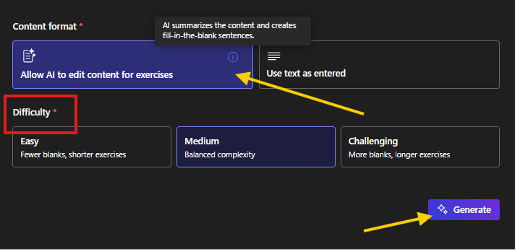
- Select content format and difficulty level. Click ‘Generate’.
- Allow AI to edit content for exercises – use Copilot to summarize your learning content and generate fill-in-the-blank sentences
- Use text as entered – use the learning content as is
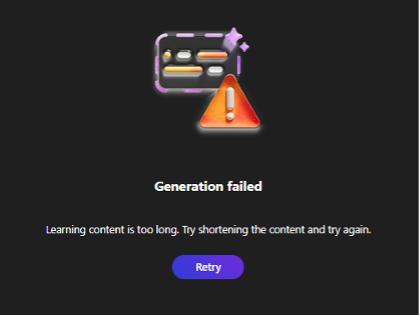
- Note: Generation may fail if your content is too lengthy. It is recommended to enter one paragraph at a time to improve the results.
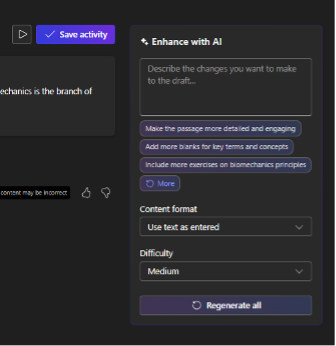
- You may click on the draft to edit the content and further customize your fill-in-the-blank statements or customize the generated content using the options on the right side of the screen. Once you’re ready to export the questions, click ‘Save activity’.
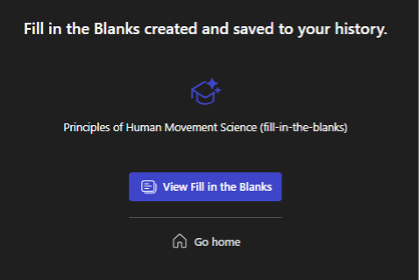
- Once you’re ready to export Fill in the Blanks, click ‘Save activity’.
I’d like to start using Teach to help me create teaching materials. Do you have any tips for me?
- Use it as a starting point, then personalize
- Teach is a powerful tool for generating lesson plans, assessments, and instructional materials, but it works best when paired with your expertise. Treat it as a teaching assistant. Use its suggestions to create drafts or to find inspiration, then adapt the content to suit your students’ needs and learning styles. Always remember to add your voice, examples, and pedagogical strategies to make the material truly effective, personalized, and engaging.
- Iterate often
- Update your teaching materials based on student feedback and performance against learning outcomes. Consider using Teach to revise and improve your teaching content regularly. For example, if you feel that a lesson isn’t working, ask Teach to help you reframe or simplify it, or offer alternative approaches. Frequent iteration ensures your teaching materials stay relevant and impactful.
- Use it ethically and responsibly
- Ensure that your use of AI complies with Humber’s Digital Campus Plan. Review Humber’s official stance on using AI tools at work before you use Teach and other AI tools at work. While Teach can facilitate content creation, it’s always essential to uphold academic integrity. Always review AI-generated materials for accuracy, bias, and appropriateness and avoid using Teach to generate content without vetting them thoroughly.
Contact the Innovative Learning Support Centre if you need support. We are here to help!