What is a ‘Breakout Room’ in Microsoft Teams?
Foster connections and meaningful discussions in medium to large Teams meetings by creating breakout rooms. Breakout rooms are a setting you can configure before or during a Microsoft Teams meeting that sends participants and/or students to small independent groups, where they might work on assessments or discuss a topic. Please note that you can only create and manage breakout rooms when you use Teams for desktop to organize a meeting with up to 300 people. You’ll need Teams for Windows or Mac to create breakout rooms for your students (students will be able to join from any version of Teams – web or desktop app).
Please learn more in the video that follows:
I find breakout rooms a bit overwhelming. Where do I start?
The breakout room feature is an excellent way to boost student engagement during online class sessions. Like any new tool, it may take a bit of practice to get comfortable, but not to worry, it’s quite straightforward.
To start and manage breakout rooms, you must be either the meeting organizer or an appointed breakout rooms manager. If you created the meeting, you likely already have these capabilities.
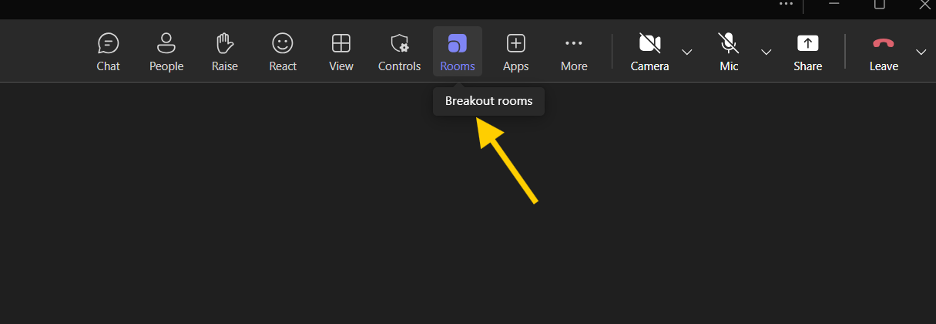
To launch breakout rooms, begin the meeting and click the ‘Rooms’ icon located on the top menu bar.
How do I assign people to rooms?
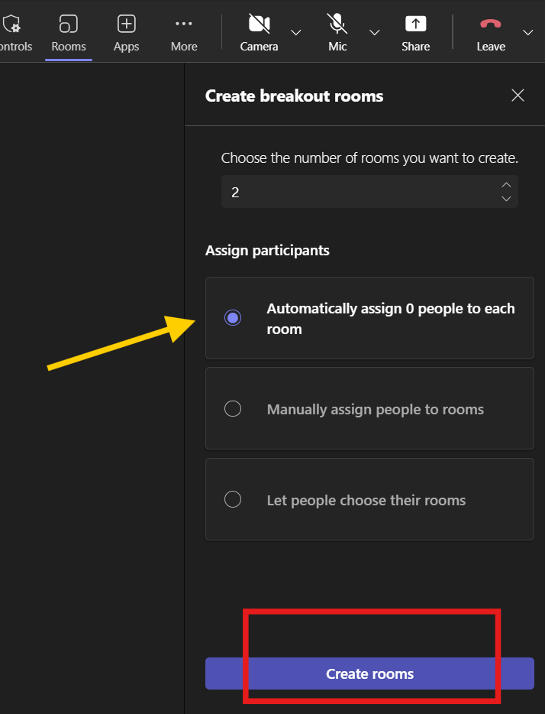
When the breakout room window opens, you’ll be able to choose how many rooms to create and assign participants to each one. For efficiency in an online class setting, it’s recommended to select the automatic assignment option, which evenly distributes participants across rooms.
If you have pre-determined student groups, you may choose to manually assign participants. This setup can be done in advance; otherwise, you’ll need to manage assignments during the live session. You also have the option to allow participants to choose their own rooms, though this is generally not recommended unless you have a specific use case.
Once your selections are made, click ‘Create rooms’ to proceed.
How do I manage the rooms?
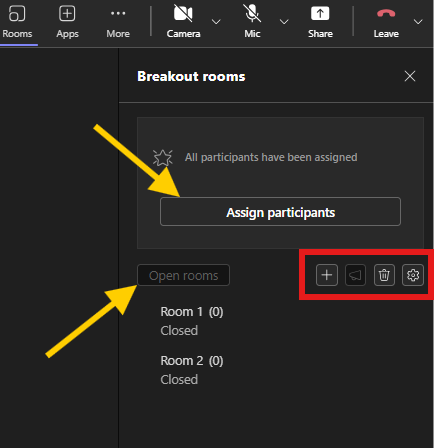
Once breakout rooms are created, you’ll have access to various management options. Click ‘Assign participants’ to view detailed room assignments or to shuffle participants between rooms. You’ll also see options to rename, add, or delete rooms, make announcements to all rooms, and open the breakout sessions.
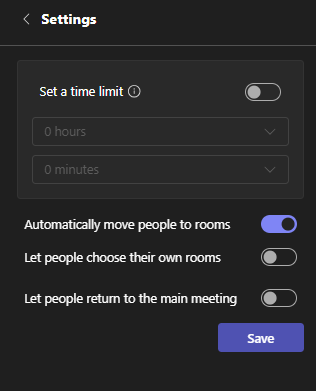
To set a time limit or adjust room settings, select the gear icon. It is strongly recommended that you review these settings before your online class to ensure a smooth experience.
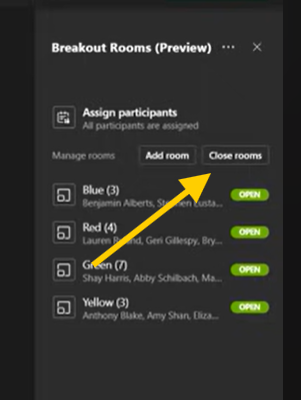
How do I end the breakout rooms?
To close the breakout rooms and end the session, use the ‘Close rooms’ option, which becomes available while the breakout rooms are active. It’s recommended to make an announcement to all breakout rooms before closing them, so participants have time to wrap up their discussions.
Can I record breakout room sessions?
Yes, breakout room sessions can be recorded either by you as the organizer or by any participant within their respective breakout group. When breakout rooms are opened, separate chat windows are created for each room. After the session ends, the recordings will be available in the corresponding chat window. Both the meeting organizer and the person who initiated the recording will be designated as co-owners of the recording, ensuring shared access and management capabilities.
Can participants start a whiteboard activity in breakout rooms?
Yes, participants can initiate a whiteboard activity within their breakout rooms. However, please note that if breakout sessions are recorded, the whiteboard content will not be included in the recording. The whiteboard file will be saved to the OneDrive account of the person who started the activity.
To ensure you retain access to the whiteboard files after the session, it is recommended that you, as the meeting organizer, create the whiteboard activity yourself and share the link with each group. This guarantees that all whiteboard files remain accessible to you after the online session.
Where can I learn more about breakout rooms in Teams?
Check out the training video Microsoft Teams: Successful Meetings, Webinars and Events on LinkedIn Learning to learn more about how to organize and manage breakout rooms in Teams. Microsoft’s support article on managing breakout rooms is also a wonderful resource to check out if you’d like to learn more about this feature.
Contact the Innovative Learning Support Centre if you need support. We are here to help!