What is Microsoft Stream?
Microsoft Stream is a powerful video platform used to create, edit, share, and manage video content like online class recordings. Stream integrates seamlessly with other Microsoft 365 applications such as OneDrive and Microsoft Teams, making it an essential tool for online teaching and learning. Here are some of its features:
- Easily record your screen with options to add text and notes, perfect for creating tutorials, lectures and presentations
- Generate automatic transcripts and captions for your videos, which can be edited for accuracy, enhancing accessibility and searchability
- Organize your video content with chapters and custom thumbnails to improve navigation and student experience
Note: Microsoft Stream and Clipchamp are now integrated in one unified interface.
How do I access Microsoft Stream?
- Go to https://myaccount.microsoft.com/.
- Click the app launcher icon and locate Stream.
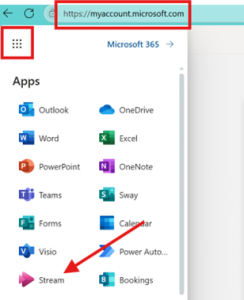
- Click on Stream to open the application.
How do I upload or choose a video?
On top of the homepage, you can create a new video by uploading a video file from your device via the Upload option (this will upload the video to your OneDrive, too) or you can select a video or file from your OneDrive. The remaining options (screen recording, camera recording, and video project) launch Microsoft Clipchamp, which is a robust video editing application that is integrated into Stream, and is also available for all Humber users.

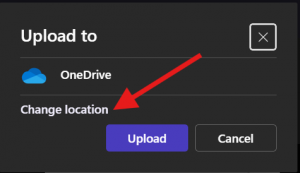
Before clicking on Upload, choose the destination folder for your file by selecting the Change location button.
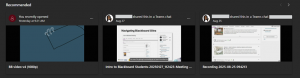
On the homepage, you will also see Recommended videos; these are usually video files that were recently shared with you from other applications like Microsoft Teams, so you can choose from these options.
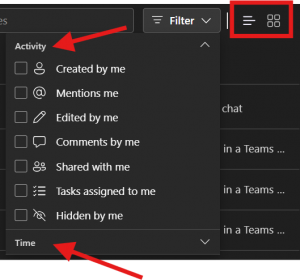
All the videos saved in Sharepoint can be accessed from the homepage as well, and filterable by time and activity. Switch between list and grid view by clicking on these top-right icons, and then find the relevant videos you need.
I opened my video, now what?
The video player interface has two modes: View Mode and Edit Mode. You can view your video from either interface, but you must be in editing mode to make changes.
How does View Mode work?
In the View Mode, you can do some of the following;

- Return to the Stream homepage, record your screen or with your camera (these options will open a new Clipchamp window), upload a new video, download the video to your device (if enabled), add it to your favorites or to a video playlist.
- Switch the interface between view and edit modes, and share the video via share link.
- View or add a comment to the video, and view the video analytics (view and engagement metrics, if enabled).
- Access video options like noise suppression, closed captioning, and playback speed.
- Play, replay, advance, rewind, and mute/unmute with these options.
- React to the content at any point in the video (if enabled).
- Video description including name, date, view count, and file location (click to edit the name and description in Edit mode).
How does Edit Mode work?
The edit mode offers more features to customize the viewing experience;
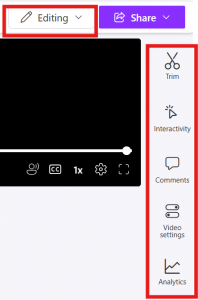
- Trim: change the start and end time, or cut off a section
- Interactivity: insert a form or a “callout” (text) to enhance engagement
- Comment: add and view the comments from viewers
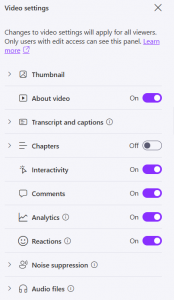
- Video settings: add a video thumbnail, transcript and captions, chapters, and enable/disable video features, which looks as follows;
Click on ‘Open editor‘ to launch Clipchamp and access more advanced video editing options.

How do I start to record my screen or record with my camera?
- Access the ‘screen recording’ or ‘camera recording’ options from the homepage:

You can also access the ‘screen recording’ or ‘camera recording’ options from the video editor:

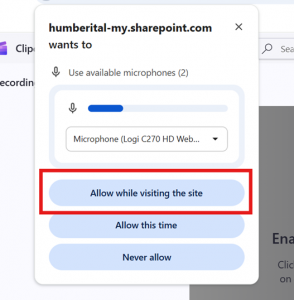
- If prompted, grant access to your device camera and microphone.
How do I record a screen recording with Stream/Clipchamp?
- Click ‘Start screen recording‘. You will then choose a screen, window, or tab to record. Be sure to close or hide content that may contain personal or private information. Note: There is a 15-minute limit on the recording. It is recommended recording smaller videos to make it easier to process or edit your video file.
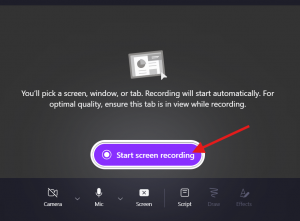
- Toggle on the audio share option if you’d like to record the audio from your screen as well.

- The automatic screen recording will start after a 3-second countdown.
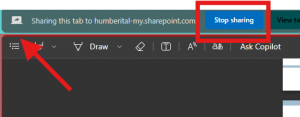
- While screen recording, you will have the option to stop, pause, or redo your recording.

- You will notice the red outline on the screen that is currently being recorded.
- These options are available while you are screen-recording:

- Turn on/off your camera
- Type in a script (teleprompter feature)
- Draw or annotate
- Add effects like text, filter, frame, board, and photo
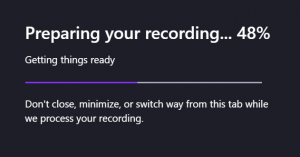
- Click Review once you finish screen-recording. It will take you to this screen where you can edit or redo the video.

- Click Finish when you are done reviewing and the video will be saved to your OneDrive.
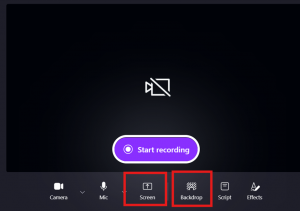
How do I do a camera recording with Stream/Clipchamp?
This follows the same steps as above; the only difference with camera recording is that you are not sharing your screen and that there is a backdrop option. However, you are still able to screen-share while recording with your camera if you choose to present with a screen.
Contact the Innovative Learning Support Centre if you need support. We are here to help!