What are student permissions?
Permissions in Blackboard allow individual users, types of users, and groups to do certain things with your items, such as read, write, or remove. Use permissions to control who can see and change your files and folders. Learn more about permissions on Anthology’s Blackboard Help site.
How do I know there is an issue with my student permissions?
Student permission issues can happen, and they may present in the following ways:
- Some students may tell you that they can’t see content.
- If your course is an HTML-based course, it may mean that some students will not see the correct styling or images.
How do I add student permissions?
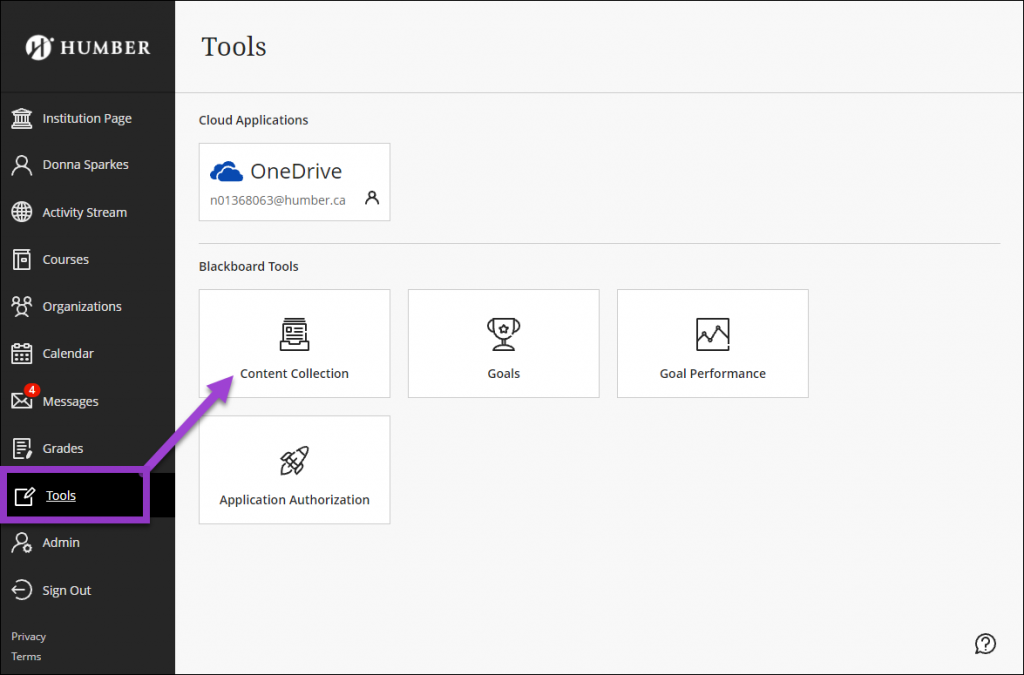
- In the Blackboard Dashboard on the left side of the screen, select Tools, and then access the Content Collection.
- Select Course Content and wait until your course lists appears. The length of your wait can depend on how many courses are in your list.
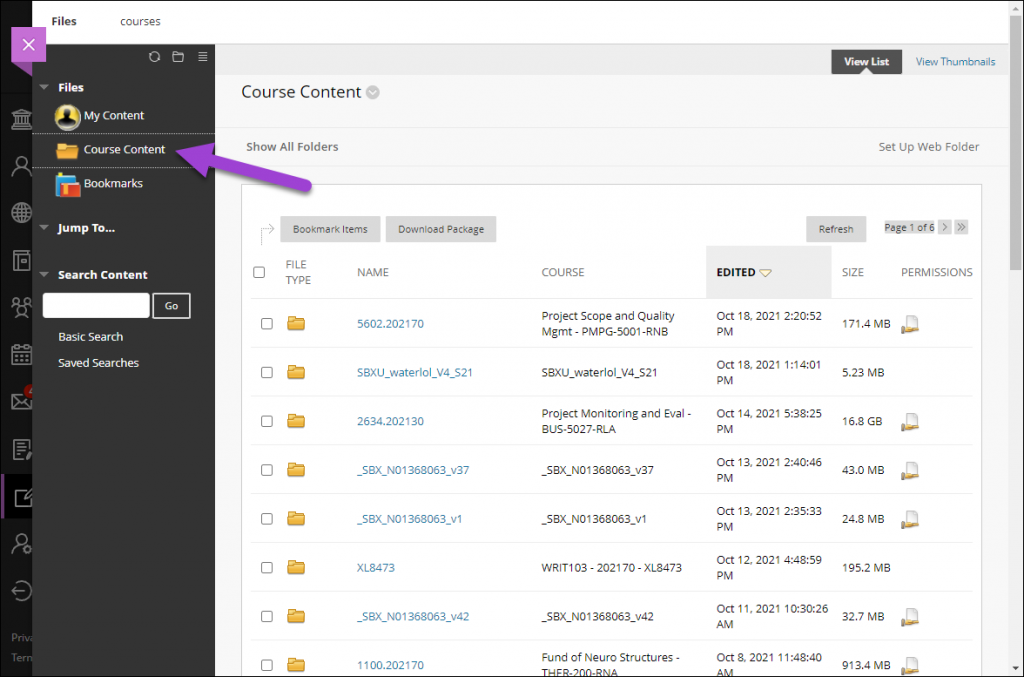
- Locate and select your course CRN (i.e. 1234.202570).
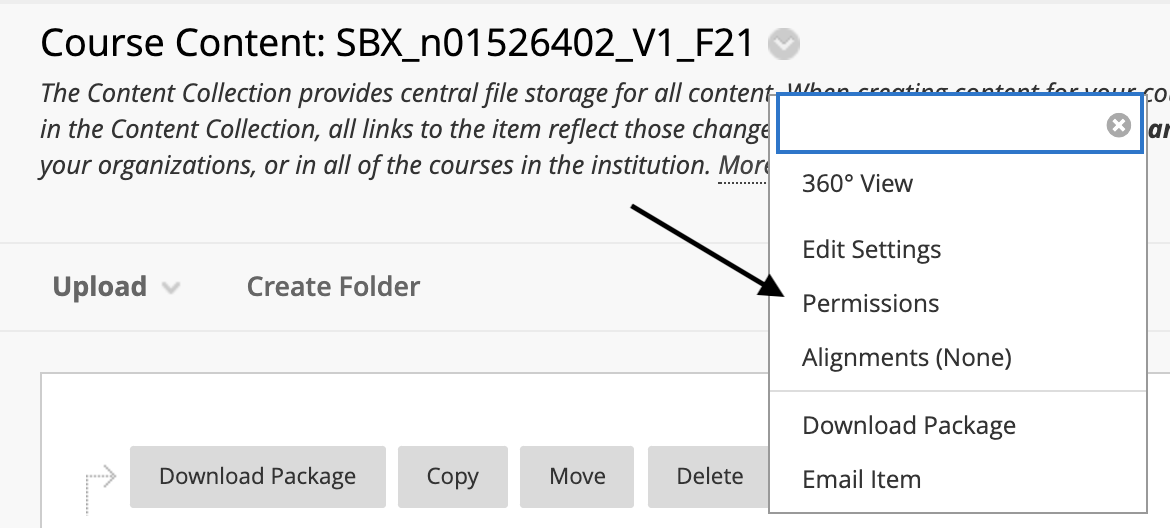
- At the top of the page, at the end of your CRN (eg. Course Content: 1234.202570) select the down arrow chevron and select Permissions.
- On the permissions page, hover over Select Specific Users By Place and select Course.
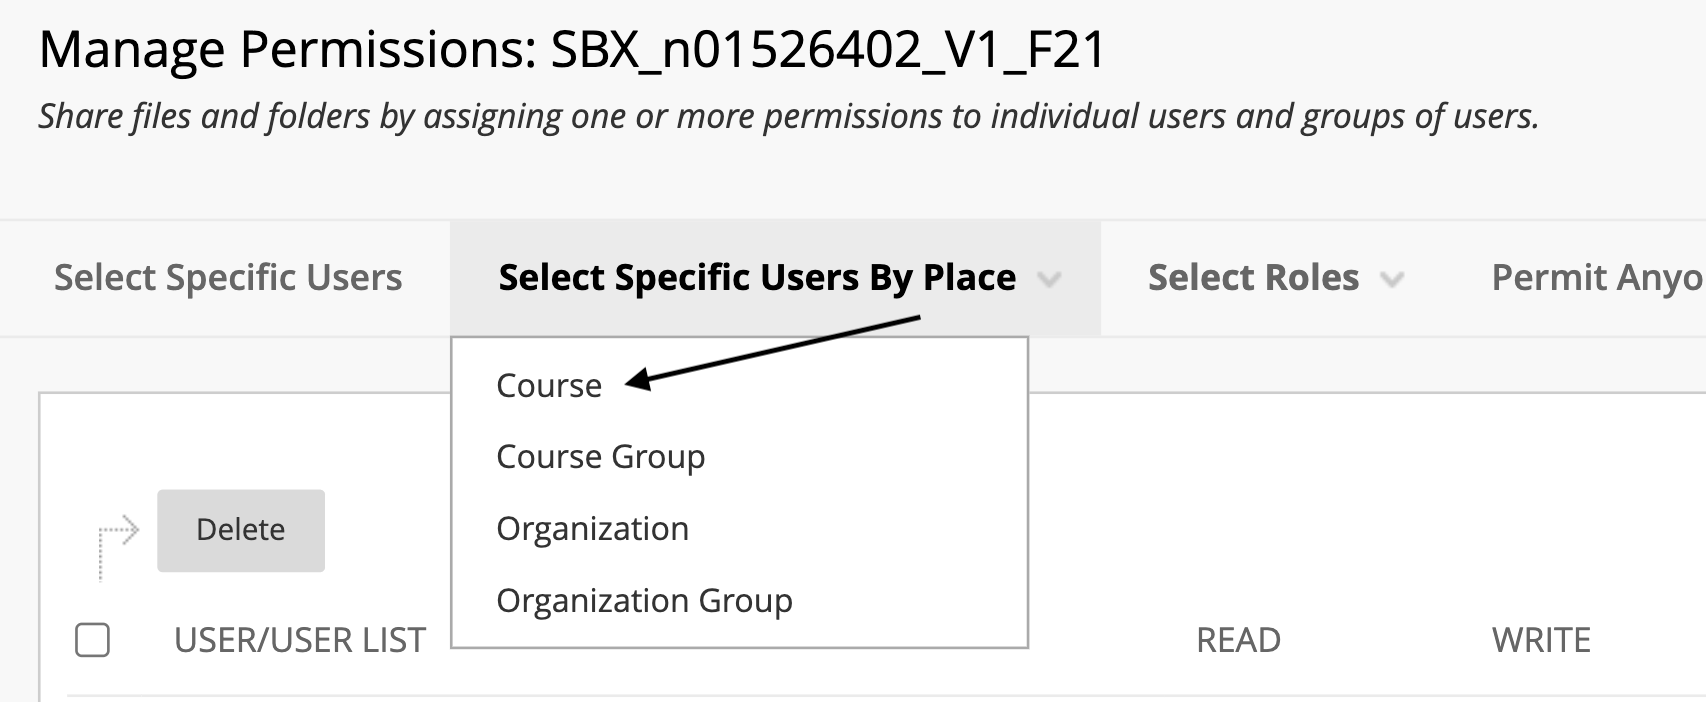
- Select your course from the list.
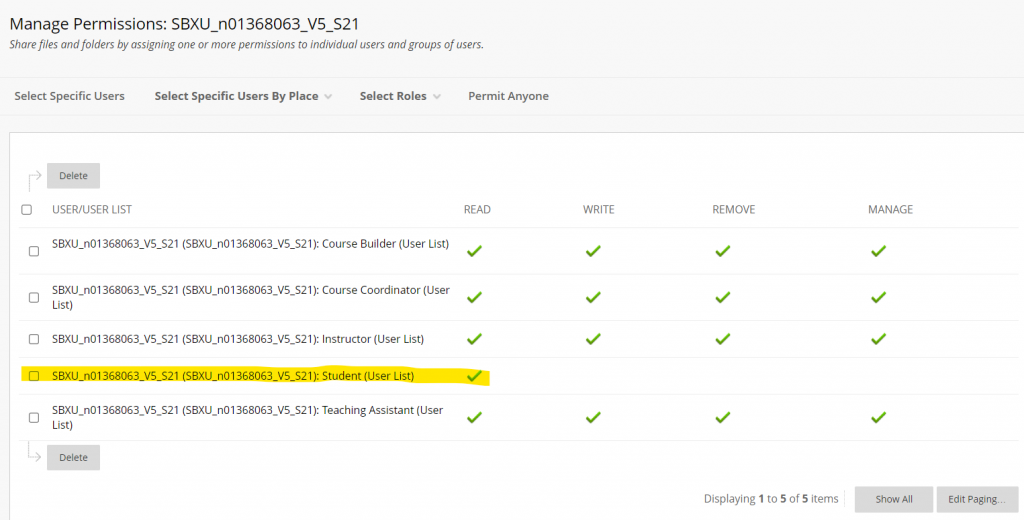
- Under SELECT ROLES select Student and under SET PERMISSIONS, ensure that only Read is enabled. Under ADVANCED FOLDER OPTIONS, select “Overwrite”

- Scroll down and select Submit.
- Check to ensure the permissions appear.
Contact the Innovative Learning Support Centre if you need support. We are here to help!