What is the Embedded Cloud Document in Blackboard?
The Embedded Cloud Document feature allows you to add files from OneDrive to:
- Your Course Content area
- Learning Modules
- Folders
You may need to sign into a Microsoft account to view and select files. After adding the OneDrive file, you may rename it within the course. You can also set student visibility. Learn more about the Embedded Cloud Document in Anthology’s Blackboard Help page, linked here.
How do I add the Embedded Cloud Document into my Course?
You can add the Embedded Cloud Document by following the instructions in the video below.
You may also follow the instructions below:
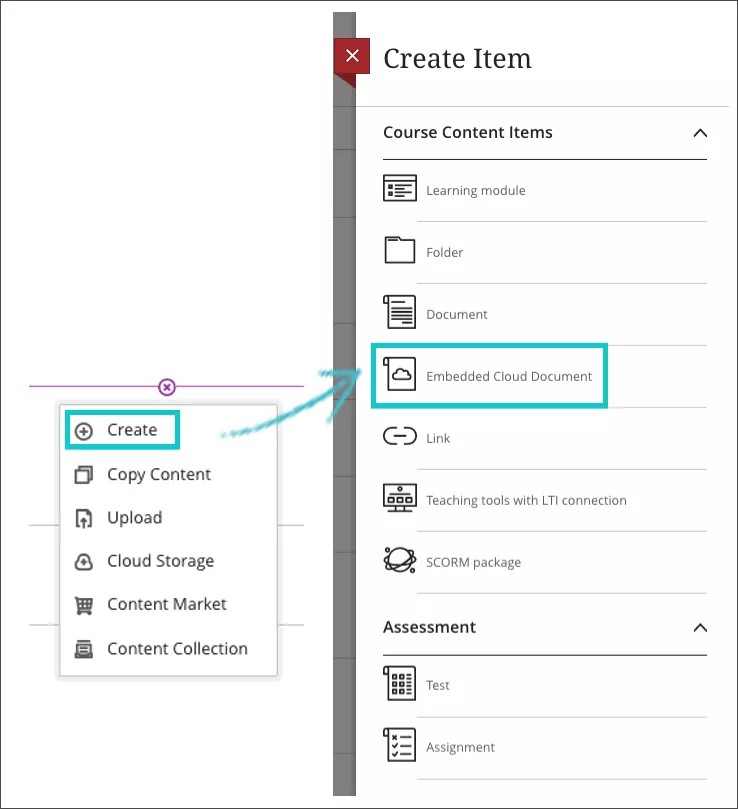
- In your Course Content page, select the plus sign menu and then the Create option. The Create Item panel opens. Select Embedded Cloud Document.
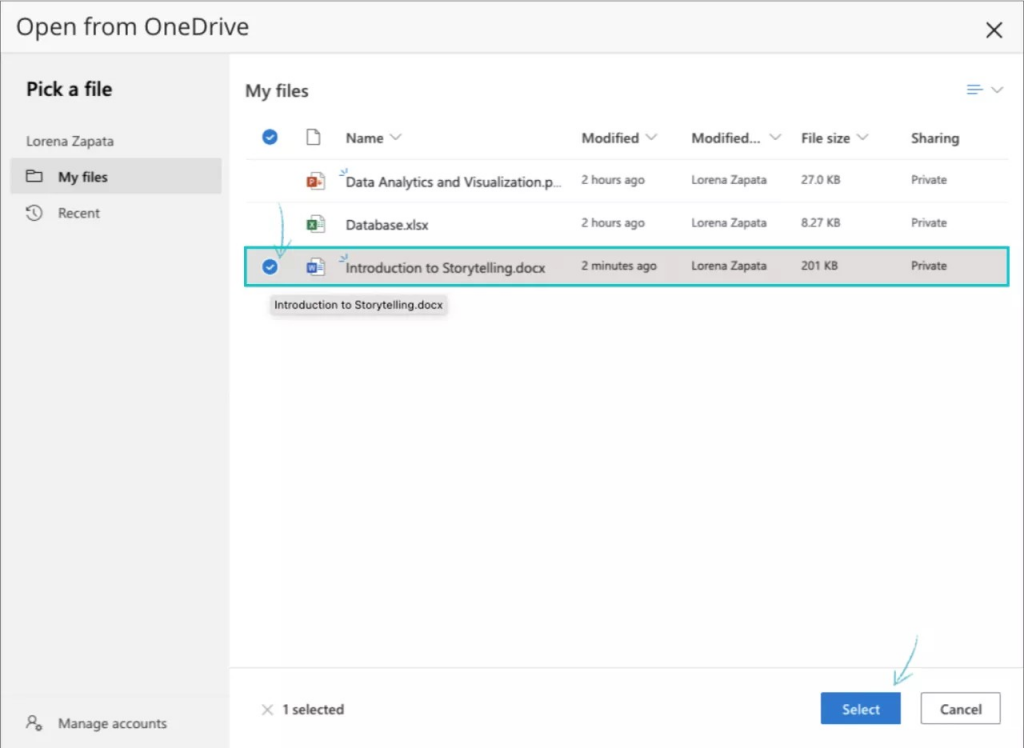
- If you haven’t signed into Microsoft, you may need to do so to continue. Use your Microsoft regular account information and follow the instructions provided.
- Once you’ve logged in, you will see your OneDrive space, where you can select the file you’d like to add to your course.
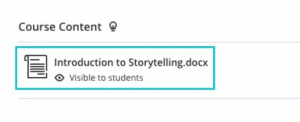
- The file will appear in the course page as a new content. You can start to use it. To change the name of the file and set visibility, select it from the Course Content list:
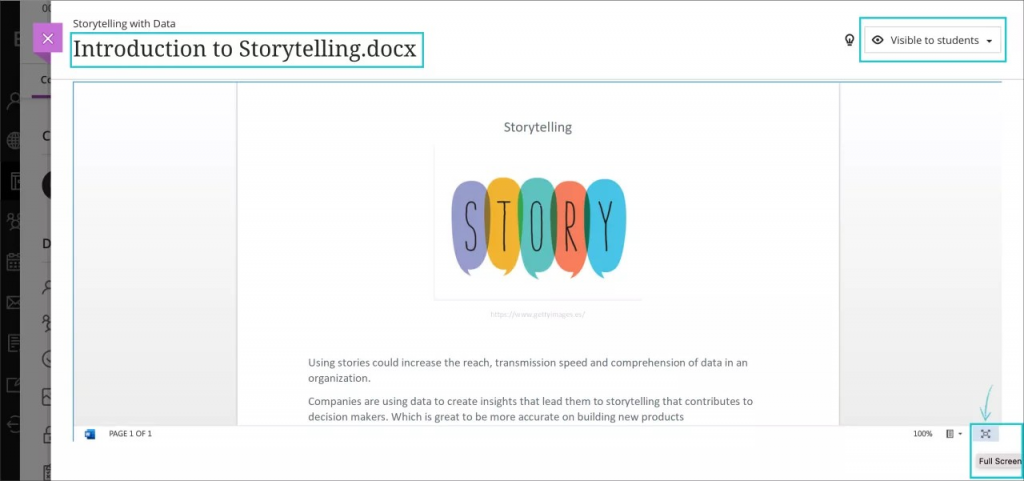
- After you change the title and visibility, you can modify the contents of the file by selecting the Full Screen option located at the lower right corner of the screen:
Contact the Innovative Learning Support Centre if you need support. We are here to help!