What is a Learning Module in Blackboard?
Learning Modules are intended for a logically structured collection of course content – similar to a chapter in a textbook. In Blackboard, you can add a descriptive image of the Learning Module and even generate one using AI. If the “Forced Sequence” setting is selected, learning module content is presented sequentially, with navigation arrows that students use to move through the content horizontally. (Instructors can only see this in Student Preview.) You can add one level of Folders to a Learning Module, meaning each folder can only contain content items, but not additional folders.
Learn more about Learning Modules in the video below:
What’s the Difference between Learning Modules and Content Folders?
In Blackboard Ultra, Learning Modules and Folders are the two types of top-level containers you can use to organize course content. Although similar, there are key differences for the student experience. Content folders are limited in their functionality in comparison to learning modules, as content is presented vertically. A Content Folder cannot contain nested Learning Modules, but you can add one level of nested Folders. Learn more about Content Folders by reading through this Faculty Blackboard Help resource dedicated to Content Folders.
How do I Create a Learning Module?
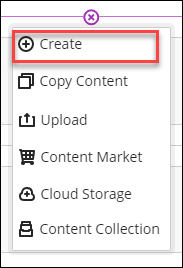
- In the Course Content area, hover your mouse where you want to add a learning module and select the plus sign > Create.
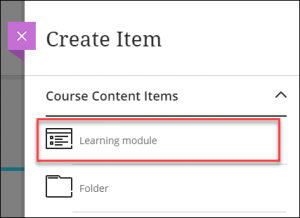
- In the Create Item panel, select Learning module.
- Name your Learning Module.
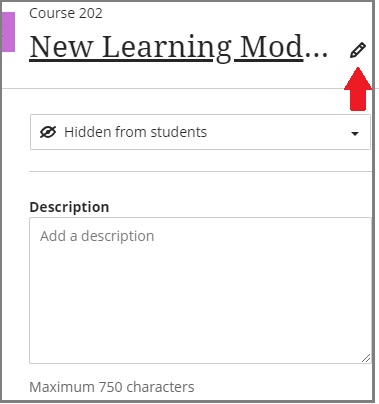
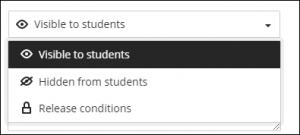
- By default, new Learning Modules are hidden from students. You can change the visibility of the learning module to “Visible to students”, “Hidden from students”, or set “Release conditions”.
- Optionally, you can add a description.
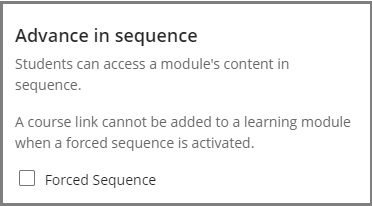
- You can enable Forced Sequence. This will ensure that students view the contents within the Learning module in sequential order.
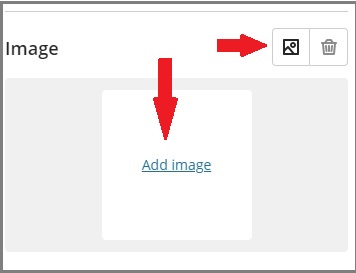
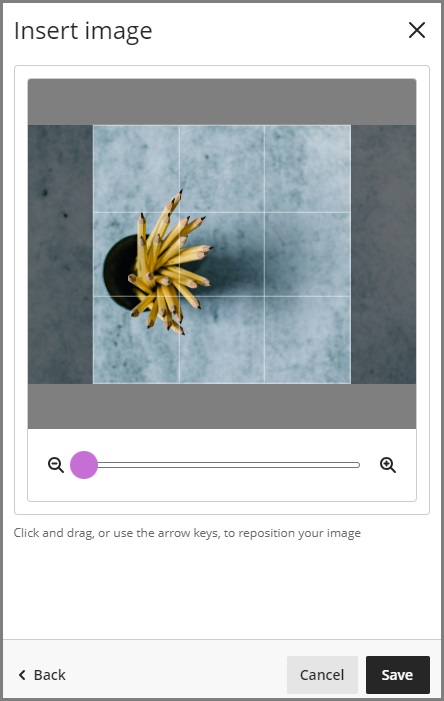
- You can also add an image. To do so, click either the icon or the link “Add image”.
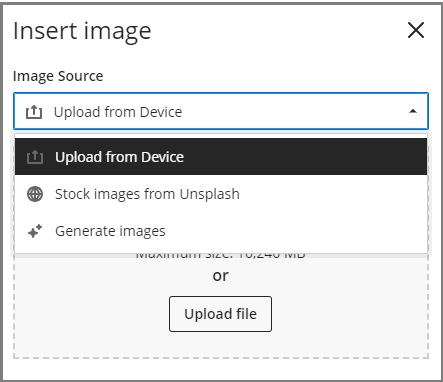
- It opens up the Insert Image panel. There are three options: Upload from Device, Stock images from Unsplash and Generate images.
- To Upload from Device, select a file you want to use from your Device.
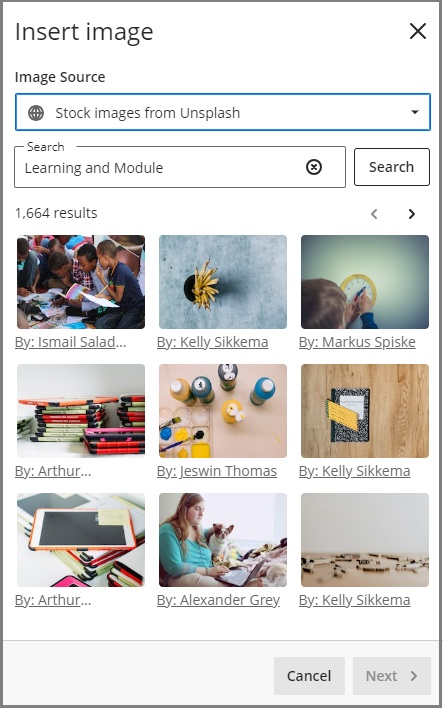
- To use Stock images from Unsplash, enter search keywords into Search, and click the Search button. It will list the search results. Select the one you want to use for your module.
- When you choose Generate images, you will receive AI-generated images that match the keywords you input. However, please be aware that these images might be culturally inappropriate or inaccurate; Innovative Learning does not recommend using this feature. They may also portray objects, animals, or people in unnatural proportions or sizes. Please read more about AI Design Assistant.
- After selecting an image, adjust how the image should be shown in the module. The image will be cropped to square. When you are satisfied, click Save.
- It opens up the Insert Image panel. There are three options: Upload from Device, Stock images from Unsplash and Generate images.
- Select Save after you made desired settings.
How do I add content to a Learning Module?
- Expand the Learning Module and within the module frame, select the plus sign.
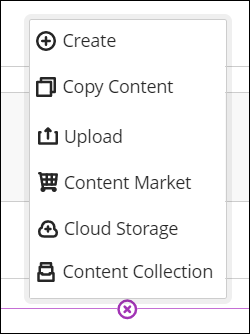
- To create new content, select Create and from the Create Item panel, choose what you want to create.
- To reuse content that already exists, select the appropriate option depending on the location of the content.
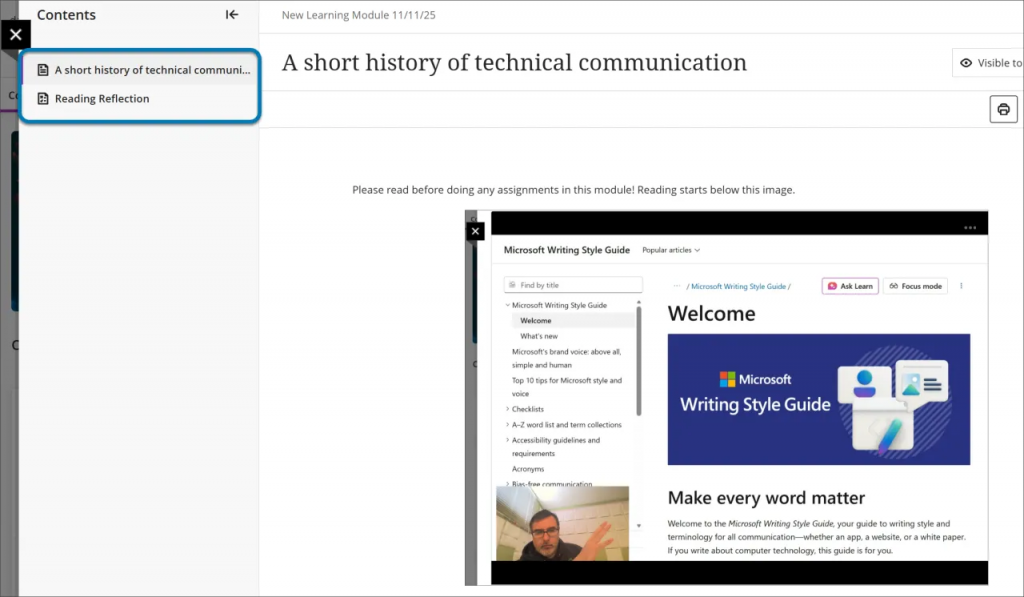
- Once you add content to your Modules, you will be able to click on each item in the module and see the ‘Table of Contents’ view that students see, as indicated in the following screenshot.
How do I generate Modules using the AI Design Assistant?
Step-by-step instructions are also here, as follows:
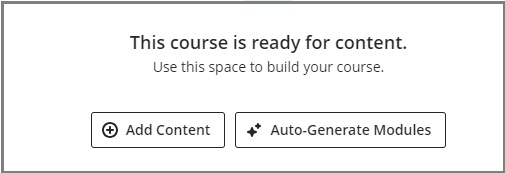
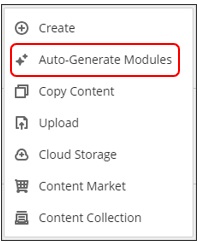
- When your course has no items set up, you can ask AI Design Assistant to generate modules. To do so, click the Auto-Generate Modules button.
- If you already have some content embedded, you can still use AI Design Assistant by clicking the + sign, then select Auto-Generate Modules.
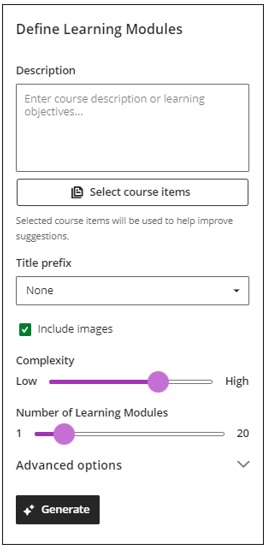
- It opens up the configuration panel. Please note that if you select include images, it includes generated images. We recommended that you replace images with real photographs from Unsplash or the files on your device. By adding properly formatted descriptions, you can create a set of modules that can be revised and utilized.
- Learn more about using the AI Design Assistant and creating Module structures by following the instructions and guidance at our “Generate Modules: Blackboard’s AI Design Assistant” article.
Contact the Innovative Learning Support Centre if you need support. We are here to help!