What is a Test in Blackboard?
Instructors can use tests to assess student knowledge of course content and to see if you’ve attained a profficient level for learning objectives. The instructor can assign point values to questions in a test, and upon grading by the instructor, students see the results that have been recorded when they are posted to the Gradebook. Learn more about creating tests in Blackboard by following the instructions at Anthology’s Blackboard Help page.
Learn more about tests in Blackboard in the video below:
Before making a Test in Blackboard…
By default, students can see test questions with their answers, as well as the correct answers, immediately after submission. To change this setting, click the gear icon in “Test Settings”, and go down to “Submission View”. By clicking on this option, you can change the settings related to assessment results viewing to ensure students don’t see the correct answers immediately after submission.
Please note: after students open the assessment, instructors can’t make these changes:
-
-
- Add new questions and answers
- Delete a question
- Delete answers in Matching and Multiple Choice questions
- Change the number of blanks in a Fill in the Blanks question
- Move the content, such as switch the order of questions, answers, or additional content
- Add or remove questions from a question pool or delete a pool from an assessment
-
How do I create a Test in Blackboard?
Follow these step-by-step instructions:
- On the Course Content page, select the plus sign > Create. The Create Item panel will open on the right.
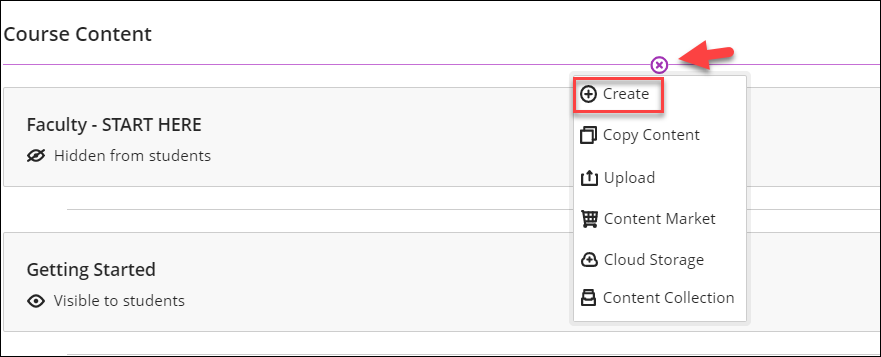
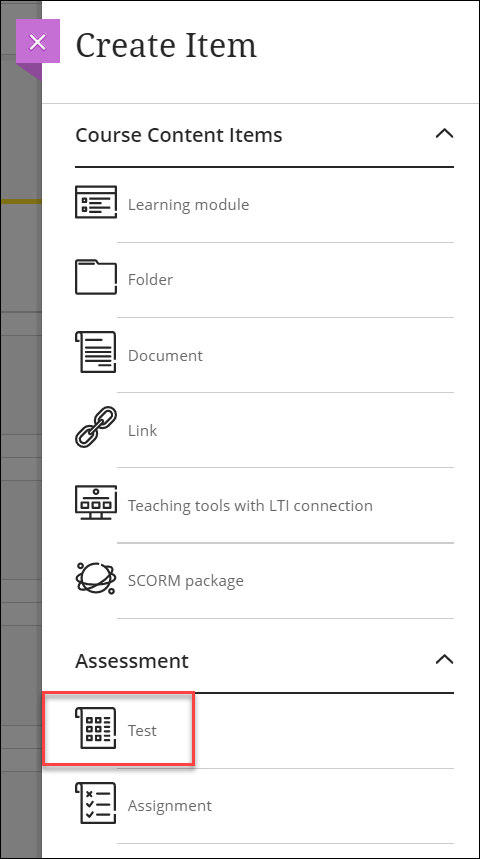
- On the Create Item panel, scroll down and select Test. The New Test page will open.
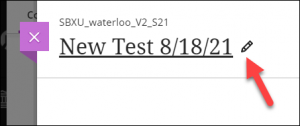
- On the New Test page, name your test.
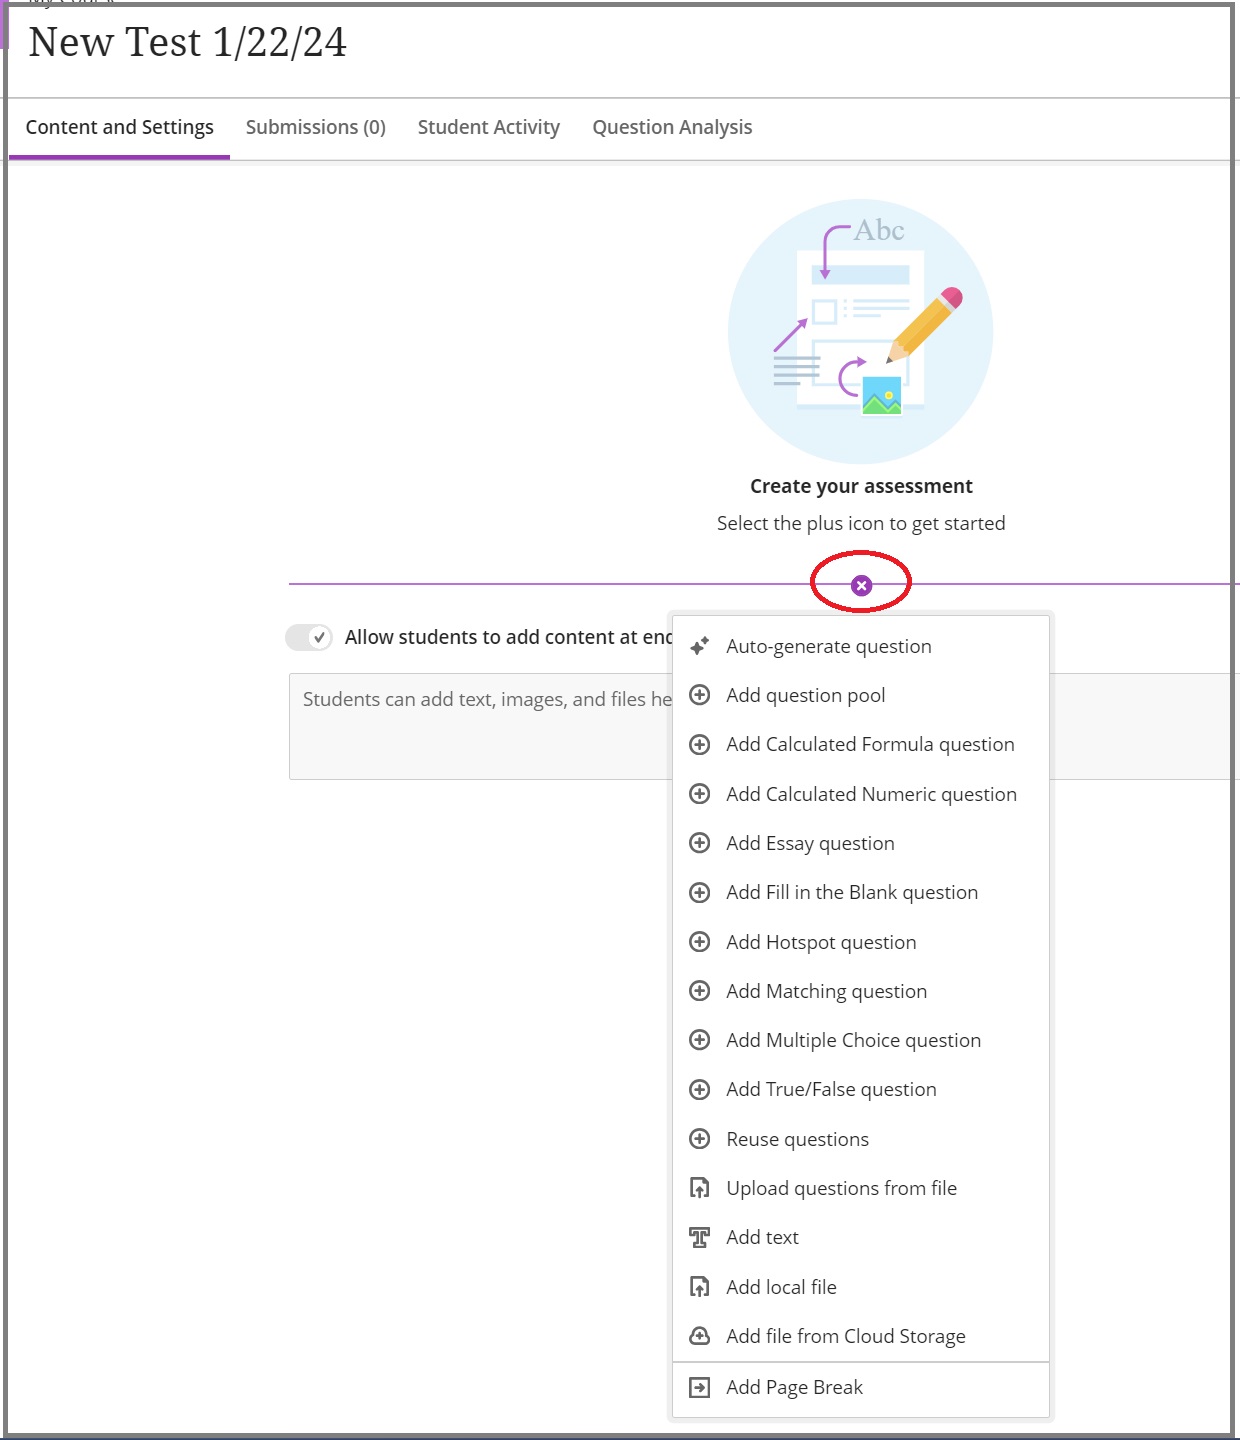
- To add a new question, select the plus sign and choose the desired question type.
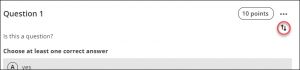
- Whenever you add a question, you have the following options:
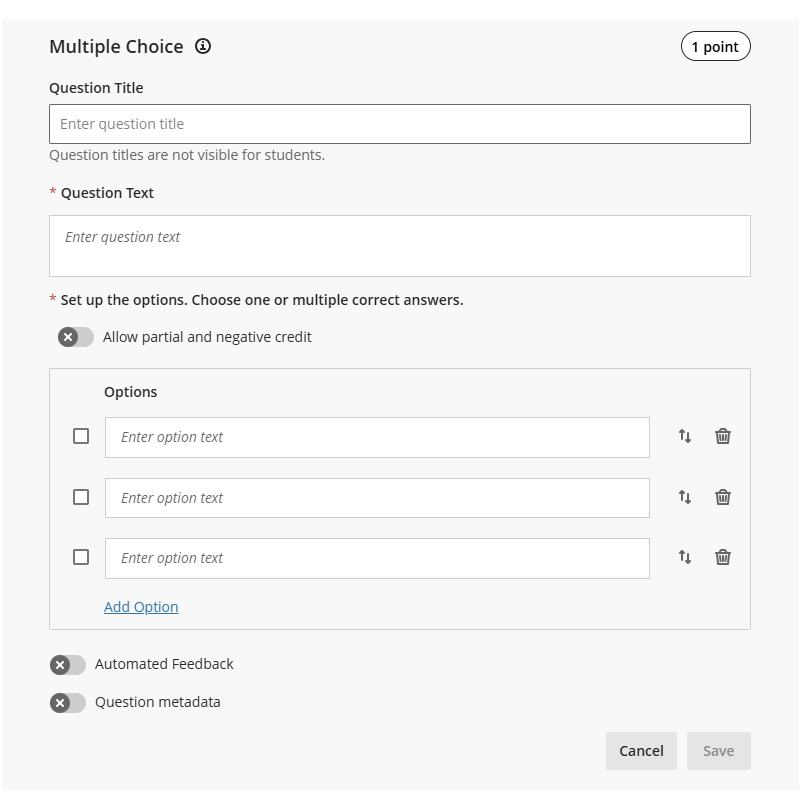
- The question title
- Question titles are not visible for students. This is to help you find questions and/or topics easier.
- The question text
- This contains the actual question that students will need to answer during their test.
- Allowing partial or negative credit
- You can assign certain options to have partial credit, or some options to have negative credit.
- The options for the answers
- These will be the options/answers for the question.
- Automated Feedback
- You can add feedback for the correct or incorrect question. We recommend using this for formative quizzes and assessments, rather than for summative assessments like tests or exams.
- and Question Metadata.
- These are tags that you can add into questions to make them easily searchable/filterable in the future.
- The question title
- Set the point value for each question you create.
- For more information on question pools, see: Creating Question Pools
- For more information on question types, see: Question Types.
- For more information on reusing questions, see: Reusing questions.
Can I use AI to help me generate test questions in Blackboard?
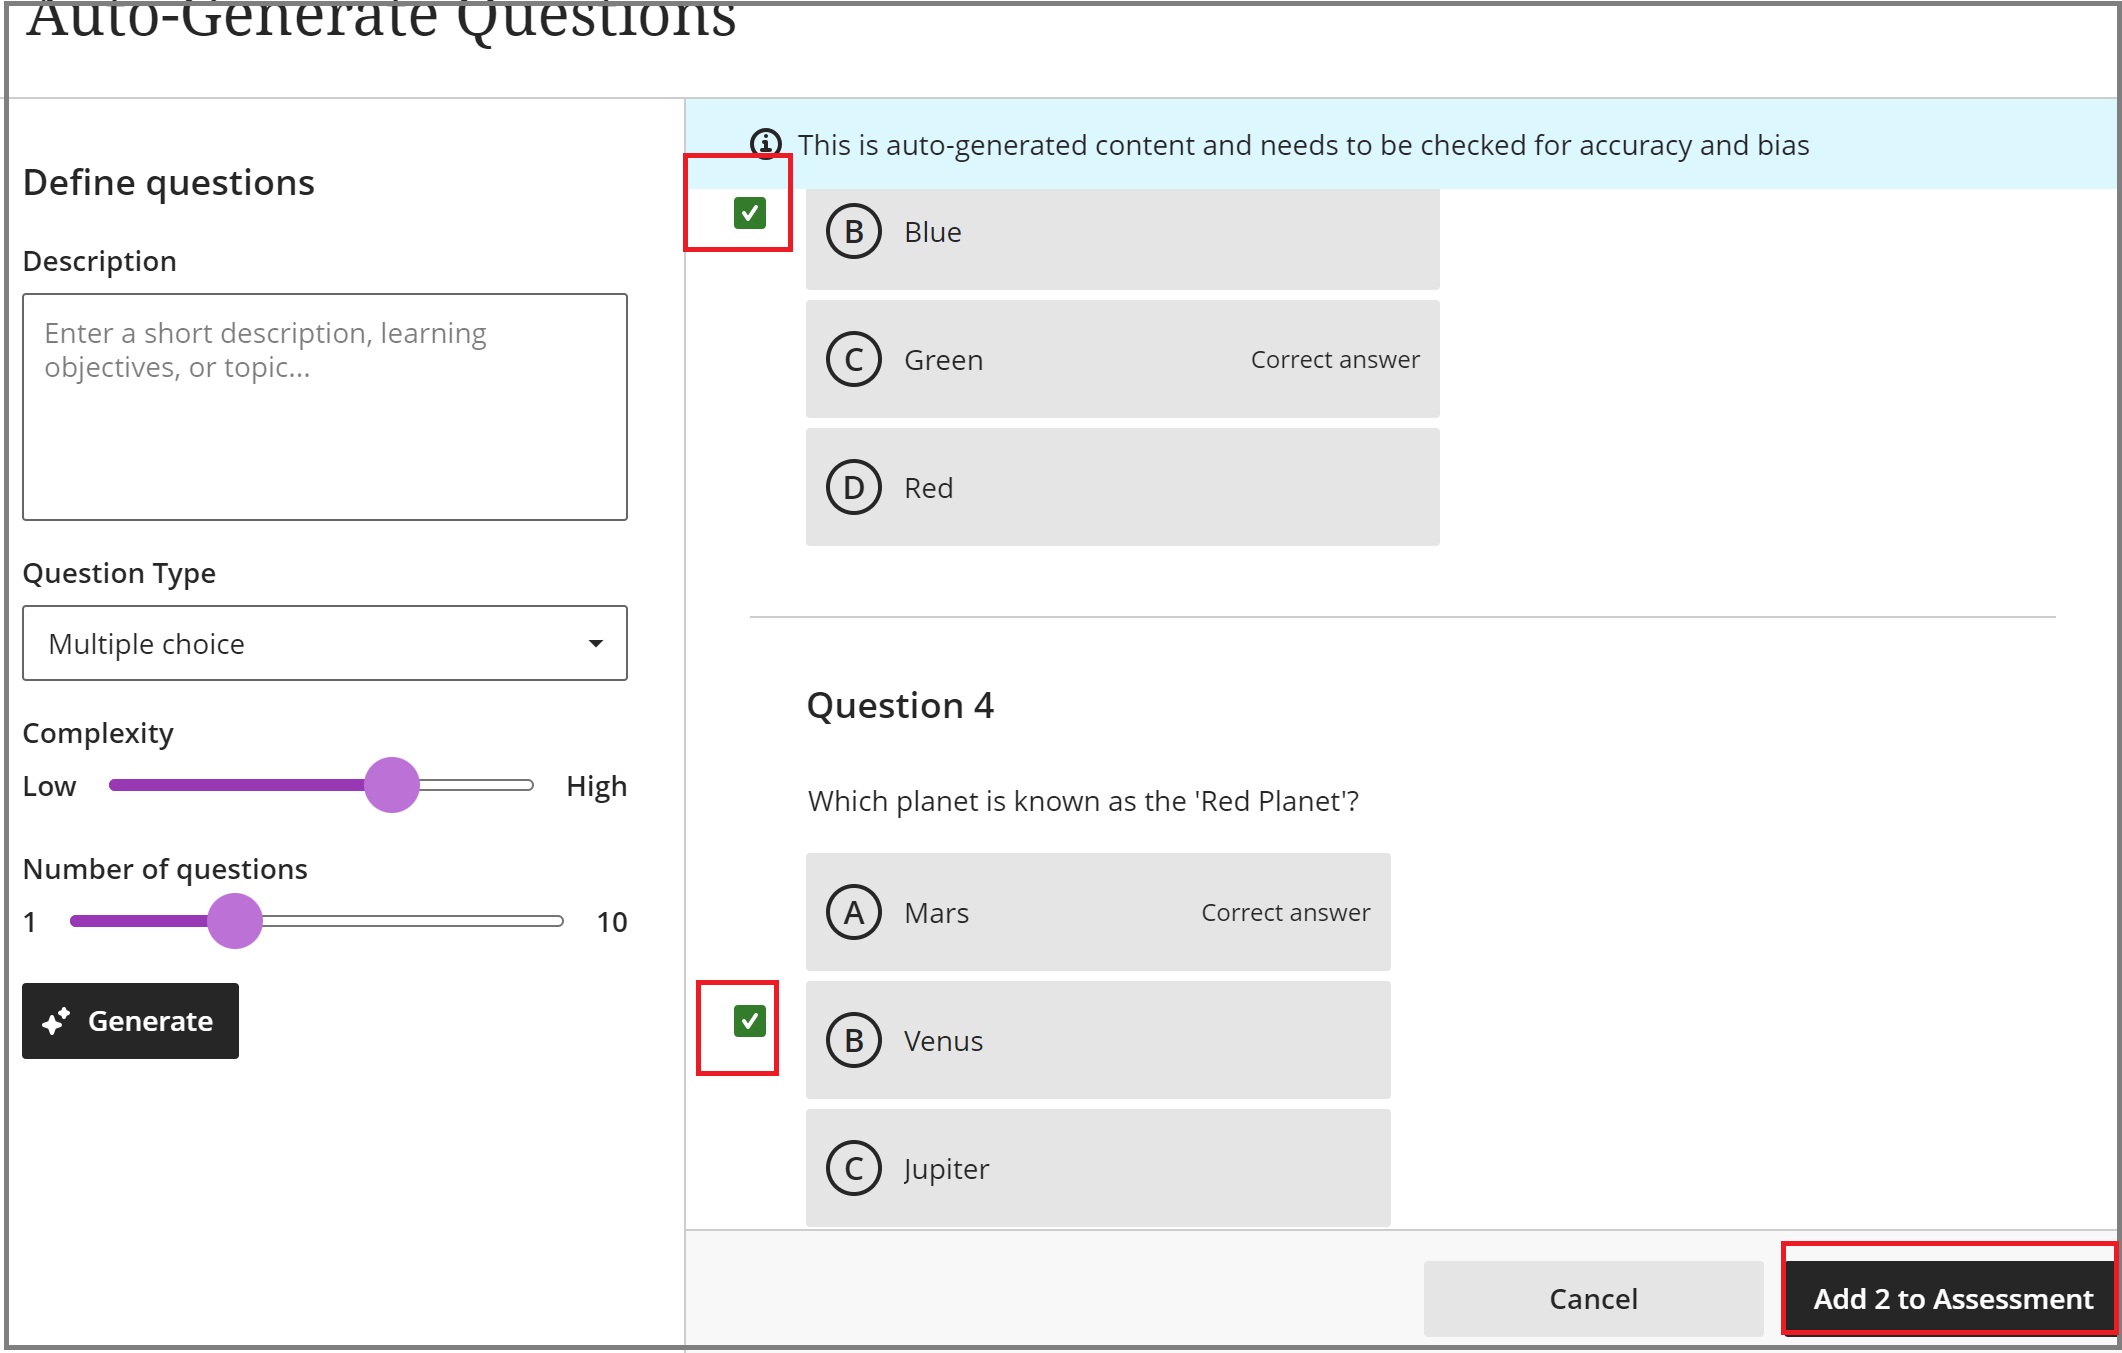
The AI Design Assistant tool has the ability to auto-generate test questions if you opt to use this feature. It’s crucial to review and edit the questions generated by the AI Design Assistant to ensure the accuracy and appropriateness of the content. For more information about the tool, please read AI Design Assistant.
- Click the ‘Auto-generate question’ option from the ‘+’ icon.
- This opens up the panel which allows you to configure various options. Currently, you can choose from the following question types:
-
- Essay
- Fill in the blank
- Matching, Multiple-choice
- True/False
Inspire me! option allows the tool to automatically generate various questions from these types.

- “Select course items” option allows instructors to select relevant items in the course so that more focused questions can be auto-generated.
- It automatically generates questions based on the default settings. However, you can modify the description, adjust the settings, and click Generate to re-generate questions based on the updated settings.
- You can modify and update the generated questions only after adding them into your Test. Select the questions you wish to modify further and click on Add [number of questions] to Assessment. Ensure you update the added questions.
-
Learn more about using the AI Design Assistant in your Tests by following the instructions and guidance at our “Generate Test Questions: Blackboard’s AI Design Assistant” article.
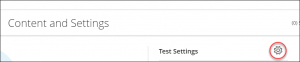
How do I change Test Settings?
- To set the test settings, select the Settings icon on the right. The Test Settings panel will open.
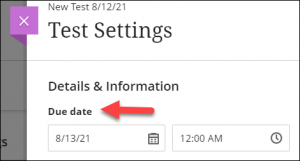
- Due Date: Setting a due date allows Blackboard to label assignments submitted after the due date as late submission. There is also the “no due date” option available.
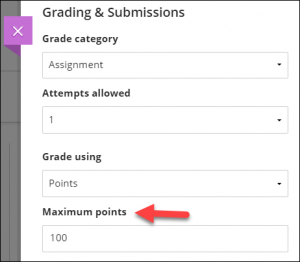
- Maximum points: Found under Grading & Submissions on the Settings panel. Enter the points possible for the assignment.
- For more information on the Assignment Settings options, see Editing the Settings Options in Ultra.
- Due Date: Setting a due date allows Blackboard to label assignments submitted after the due date as late submission. There is also the “no due date” option available.
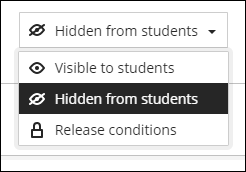
- Remember: the test will remain hidden from students until you change it. In the top right corner of the New Test page, select the drop-down arrow and choose the desired option. Release Conditions will allow you to set a unique date/time for certain students and/or require them to have completed another assessment before being able to take the test.
- After the test has been created, it will appear in your calendar. If the test is made visible to students, it will also appear in their calendar, too.
How do I Edit or Delete a test?
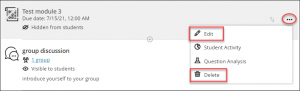
- On the course content page, locate your test.
- Select the ellipsis for more Options for the test, and then click Edit or Delete from the drop-down menu.
How do I Edit, Duplicate, Delete or Reorder Test questions?
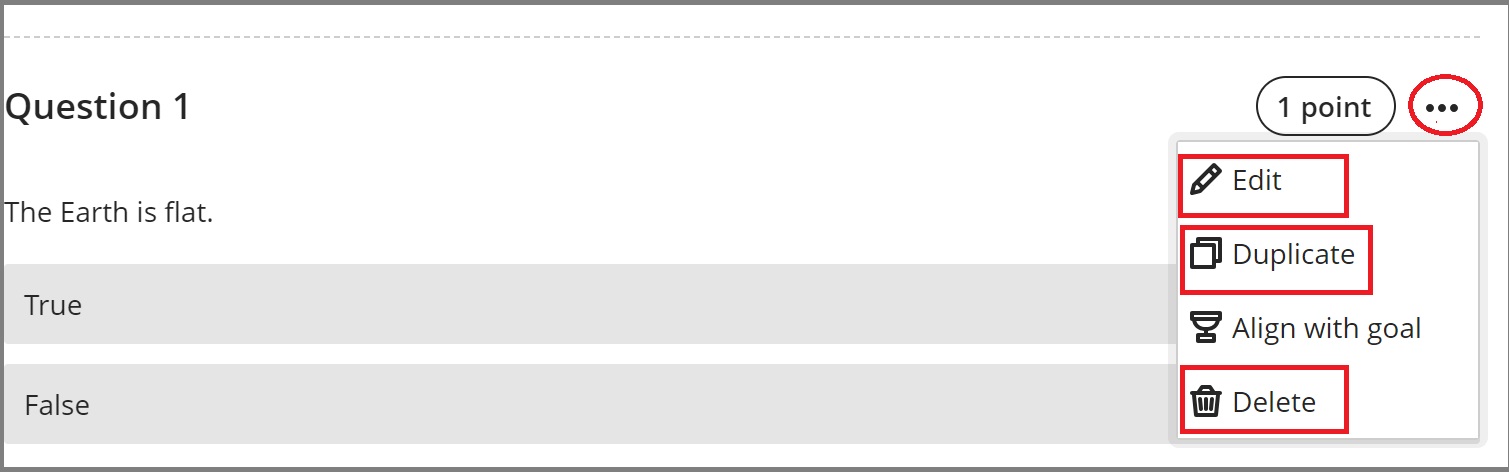
- Locate question on your test, select the 3 dots > Edit/Duplicate/Delete.
- To reorder your questions, hover over a question. Drag to reorder icon will appear on the right.
- Select the Drag to reorder icon and drag to the desired location.
- You can also bulk change question points in tests! From the ellipsis (…) icon, you can access the ‘bulk edit’ menu.

Please note: after students open the assessment, instructors can’t make these changes:
-
-
- Add new questions and answers
- Delete a question
- Delete answers in Matching and Multiple Choice questions
- Change the number of blanks in a Fill in the Blanks question
- Move the content, such as switch the order of questions, answers, or additional content
- Add or remove questions from a question pool or delete a pool from an assessment
-
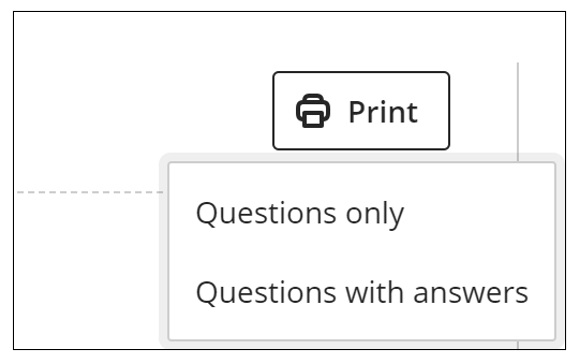
How do I print a Test?
Click on the print button from the edit page. It opens the printing menu. If you want to print a blank question test, select “Questions only”. You can also print with answers by selecting “Questions with answers”. You can print to a document or to a printer.
Contact the Innovative Learning Support Centre if you need support. We are here to help!