What is a Discussion in Blackboard?
A discussion is a place for the class to discuss certain topics, post ideas, and carry a conversation asynchronously. You can create Discussions in the Discussions area of the course, or directly on the Course Content area. You can also allow students to create their own discussion topics by updating the Discussion Settings (default is off). Learn more about discussions at this link to Anthology’s Blackboard Help site, as well as in the video below.
How do I create a Discussion from the Course Content Area?
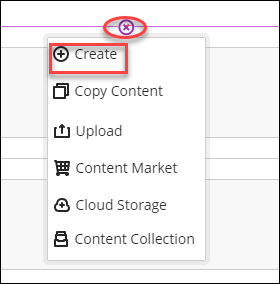
- Locate where you would like to add the discussion forum and select the plus sign > Create.

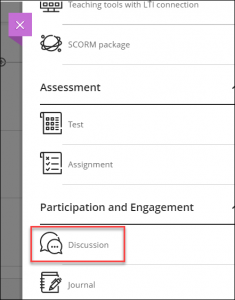
- On the Create Item panel, select Discussion.

How do I create a Discussion in the Discussion tab?
- Select Discussions on the navigation bar at the top of your Blackboard page.

- At the top right of the page, click New Discussion button.

How do I edit the settings for a Discussion?
- On the New Discussion page, enter a meaningful and descriptive title.

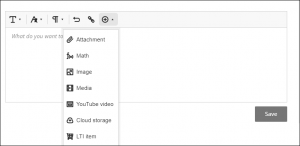
- In the Text Editor, enter the discussion topic as well as any other relevant instructions. For tips on how to use the Text Editor, see Using the Text Editor.

- New discussions are hidden by default. To make the discussion visible to students, select Hidden from students (top-right corner). A drop-down menu will appear, select Visible to students.

- If you want to select release conditions, see Navigating Conditional Release.
- Set the discussion settings by selecting the settings icon (top-right corner). The Discussion Settings panel will open on the right.
-
- Display on Course Content page: This option will allow you to include the discussion forum alongside other course content.
- Post First: Select Post first to hide discussion activity from students until they respond to the discussion.
- Prevent Editing: If you want prohibit students to edit their own posts, you can select this option.
- Allow anonymous responses and replies: If you want to allow anonymous posts, you can select this option.
- Grade Discussion: You can make the discussion count for a grade. When you choose to grade a discussion, Blackboard ULTRA will prompt you to choose a due date, the grade category, format, and the maximum points.
NOTE: when you enable grading for a discussion, a column is automatically created in the Gradebook. - Group discussion: You can assign students to discussion groups.
-
- You can also set requirements on the number of required posts and/or replies for a student to complete. The status of participation requirements is updated through to completion, giving a student a clear understanding of progress. Participation requirements are optional but recommended for clarity.

How do I use the AI Design Assistant to create Discussion topics?
- The auto-generate discussion button offers a list of potential discussion topics for you to choose from, which you can edit, and use, powered by AI Design Assistant.

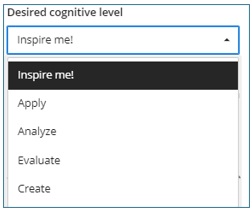
- Choose a desired cognitive level among Apply, Analyze, Evaluate, and Create, or let AI select a level by choosing the “Inspire me!” option. Adding a description, selecting the course items, and choosing an appropriate cognitive level can increase the likelihood of AI generating more usable discussion topics. You can also set the complexity and select the option to generate a title.

- Learn more about using the AI Design Assistant when creating Journals, Discussions, or Assignments by following the instructions and guidance at our “Generate Journals, Discussions and Assignments: Blackboard’s AI Design Assistant” article.
Can I edit and/or delete a Discussion once I’ve made it?
Yes, you can!
- On the Discussion page, open the Discussion’s menu (3 dots) > Edit/Delete.

- You can delete an entire discussion along with all the responses and replies, or you can choose to delete specific responses and/or replies. When you enter the discussion, you can clikc on the ellipsis (…) beside a post or reply to either edit or delete it.

How can I organize my Discussions in Blackboard?
If you go to the discussions tab from the top menu, you have an option to organize discussions in folders. If your course has many discussions, it is a good idea to organize them in this way so that it is easy to find each discussion topic.

Contact the Innovative Learning Support Centre if you need support. We are here to help!